
Let’s Talk About Hats

About a cowboy's sanctuary - the cowboy hat
Reading time: approx. 6 minutes.
Sunday, August 01, 2021
Nebraska Territory, 1862. In the midst of a snowstorm, a certain James Butler Hickok rumbles into a snowed-in horse station. The at that time 25 years old good-for-nothing, gambler and day laborer has not yet taken his role in the just begun war of secession. That's when he meets five outlaws by pure chance in this godforsaken outpost. One of these unlucky ones makes the mistake of brushing Hickok's fur cap off his head. - What follows is a sequence of 20 seconds; between minute 8:37 and minute 8:57; in the cult western "Wild Bill"; starring Jeff Bridges ... - At the end of the scene the outlaws have all been busted and a bone-dry 'Wild Bill' Hickok speaks the famous sentence and at the same time the credo of every Old West buff;
Never touch another man’s hat!
– James Butler Hickok in “Wild Bill“ with Jeff Bridges
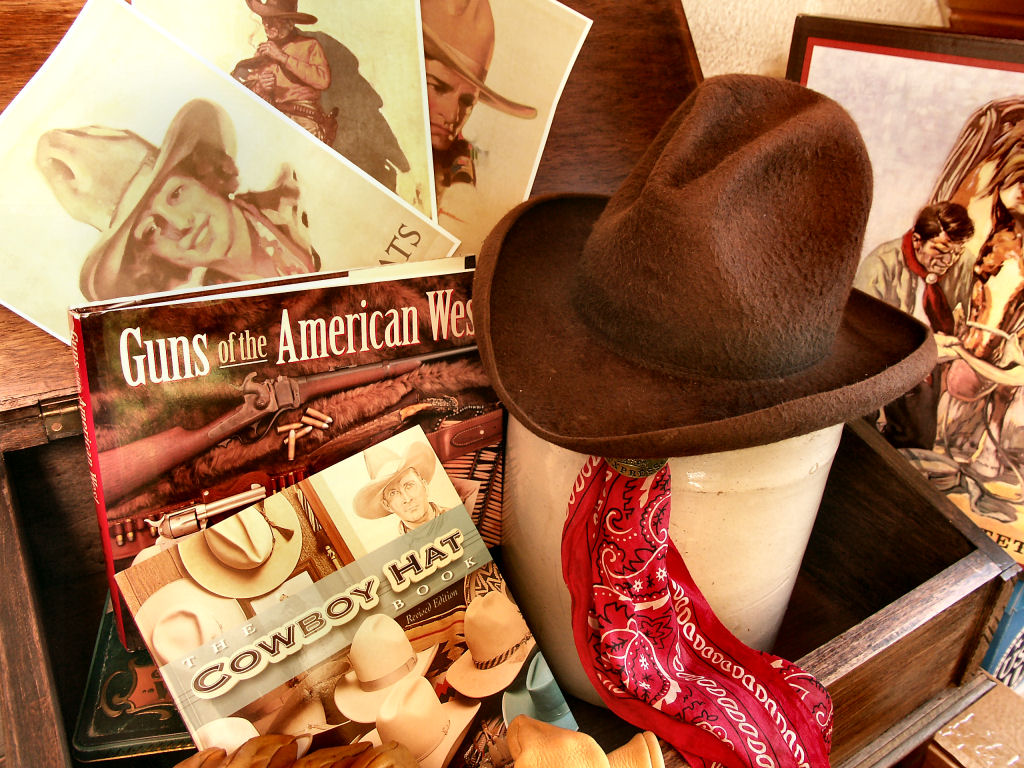
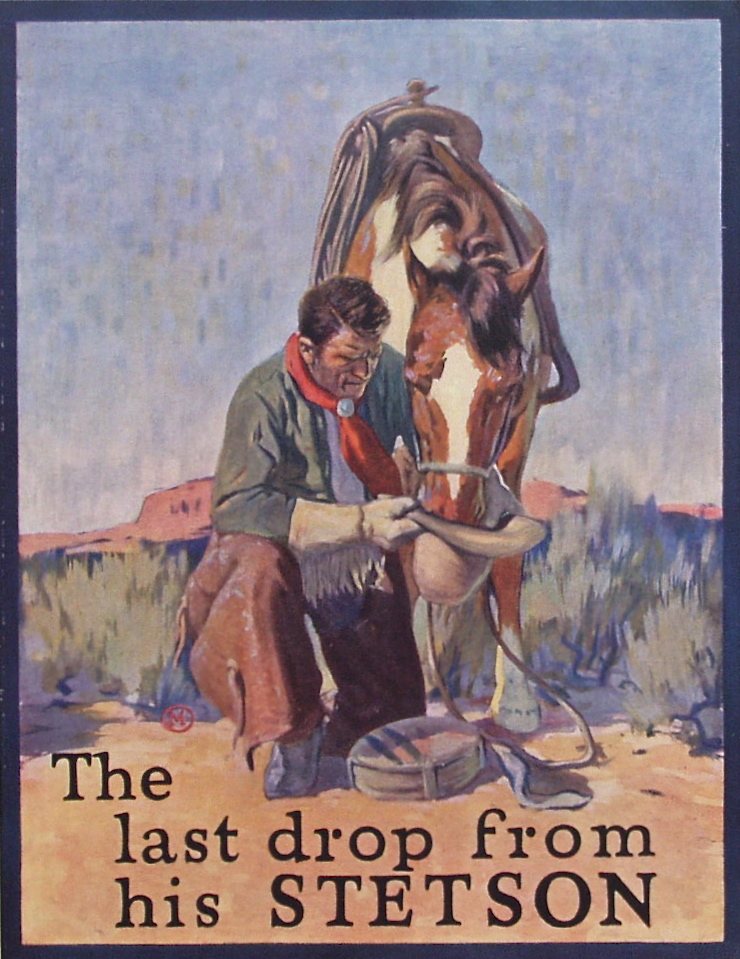
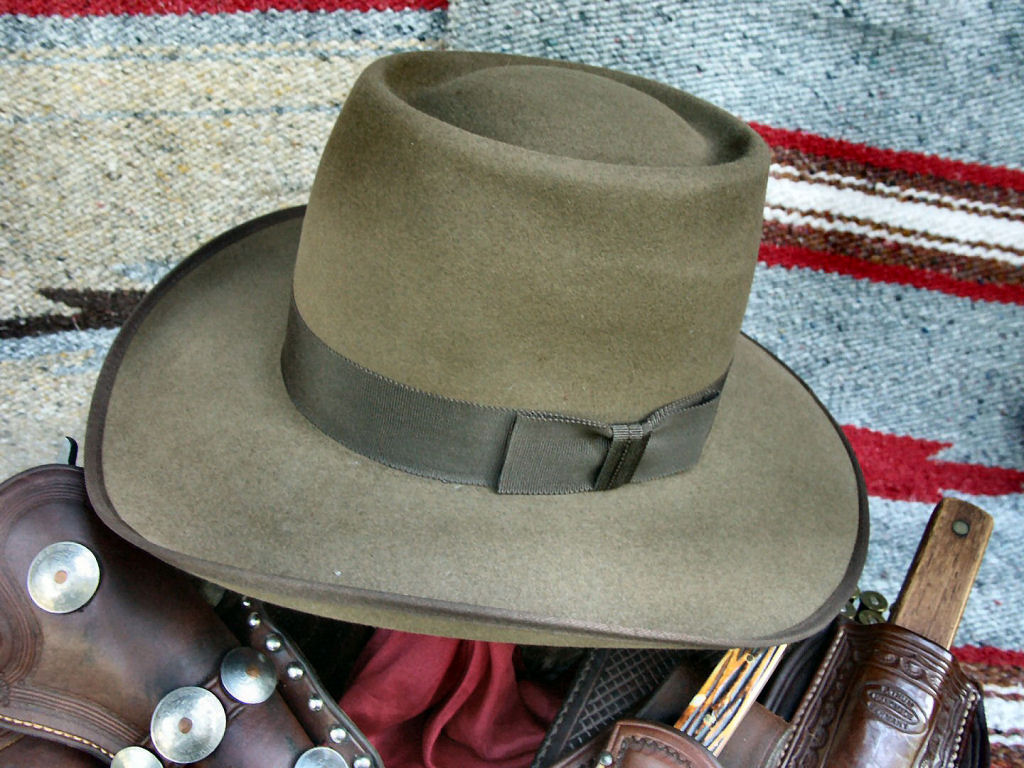
An old STETSON cowboy hat from a 'Movie-Town' in New Mexico, U.S.A.; in its heyday STETSON sold 3 million hats a year.

The cowboy hat as a mark of personality
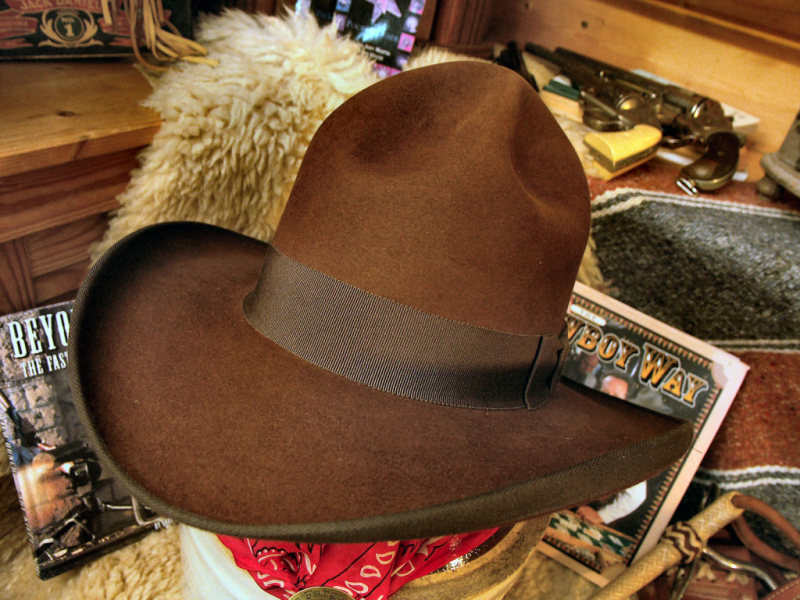
Nothing else identifies the Western hobbyist - in the cowboy section - as clearly as the hat he wears! When I took up the hobby in the 1970s, the advisors who helped me put together my outfit overwhelmed me with their expertise. But there was only one thing these 'old timers' agreed on: the hat had to fit me and my 'alias'! And, of course, it had to be a STETSON ! And since I wanted to portray a simple, nameless cowboy, I got to know the archetype of the 'US-American Cowboy Hat': the 'Boss of the Plains'; or, as it is also called, the 'Austral', the 'Mormon Hat' or simply the 'Open Crown'.
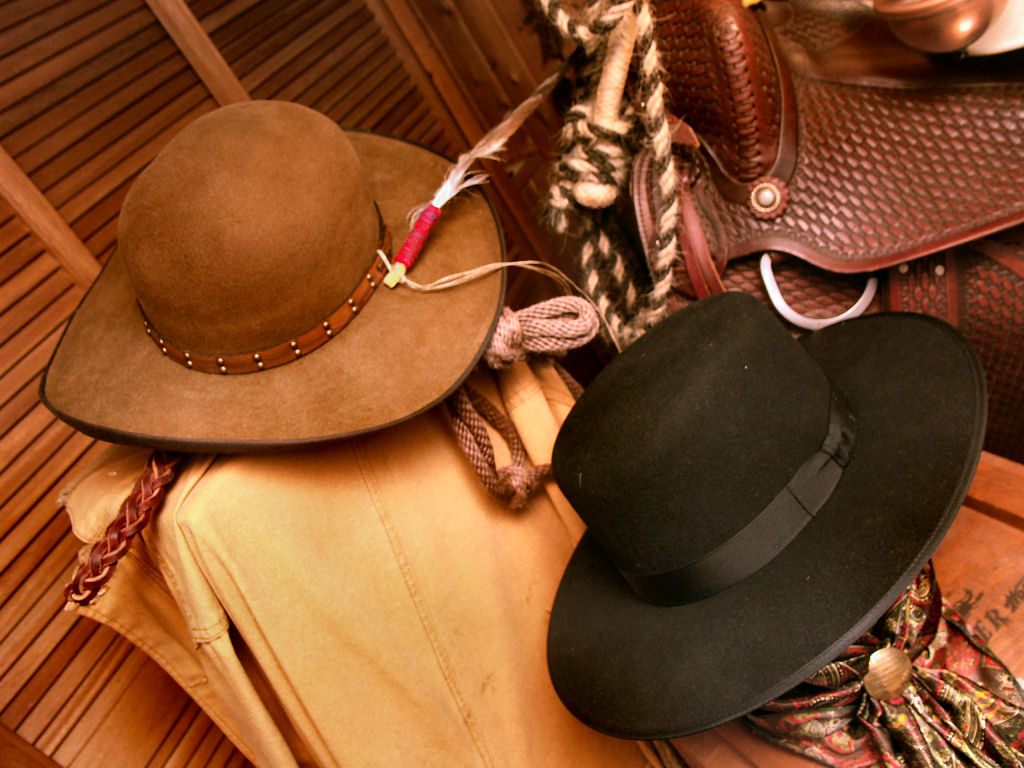
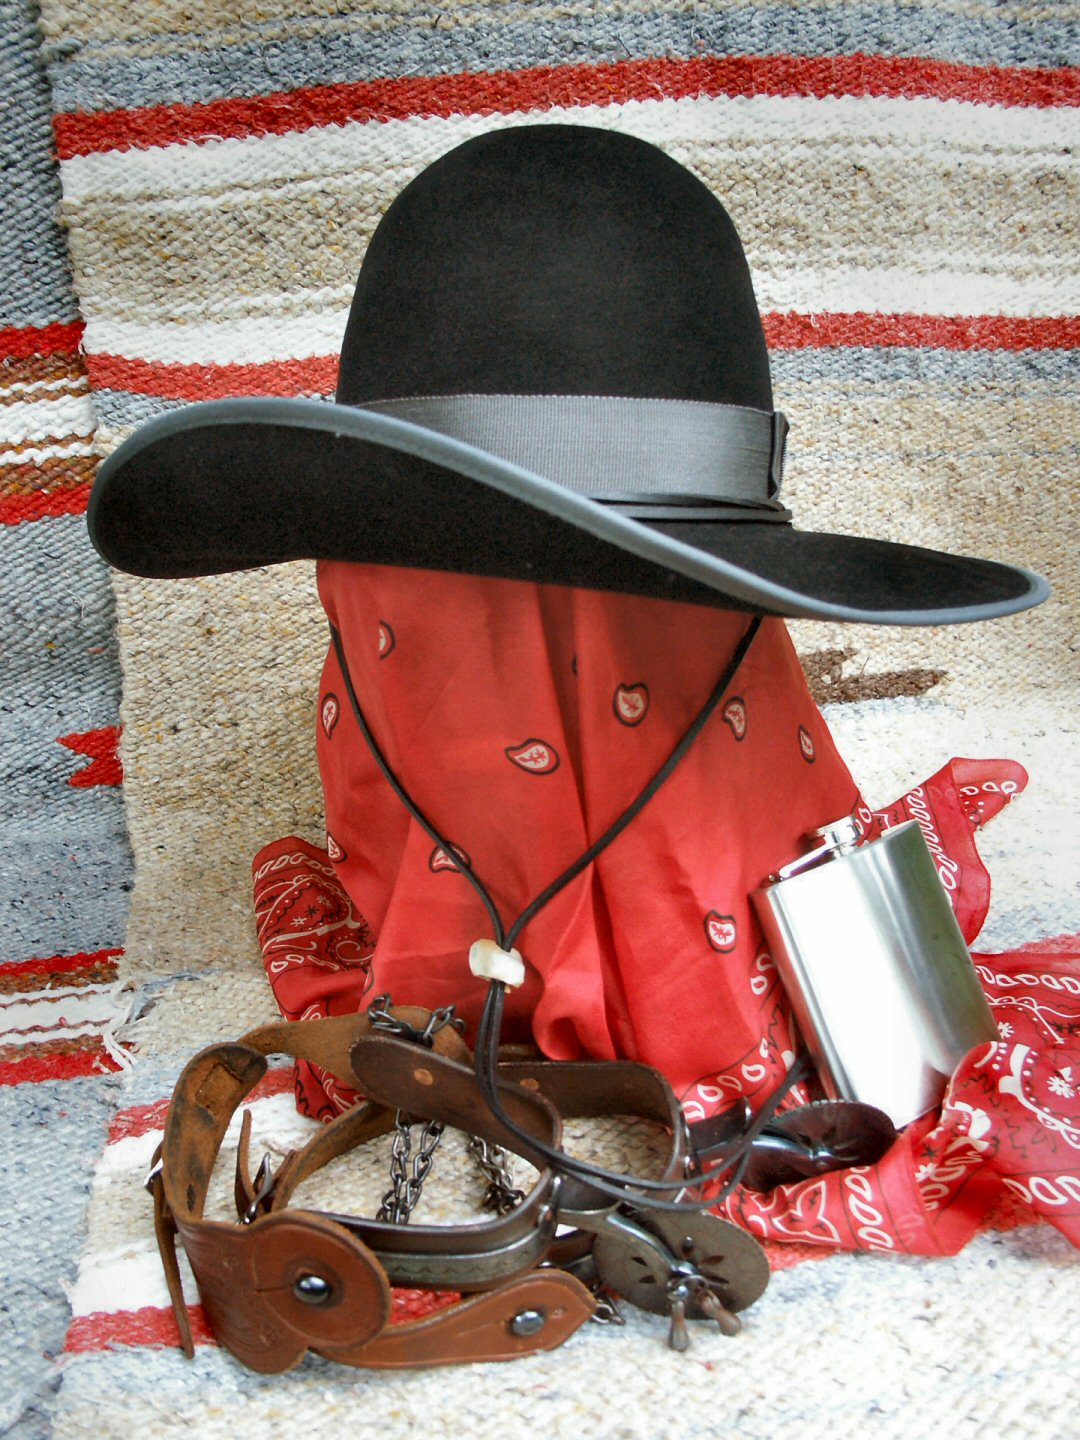
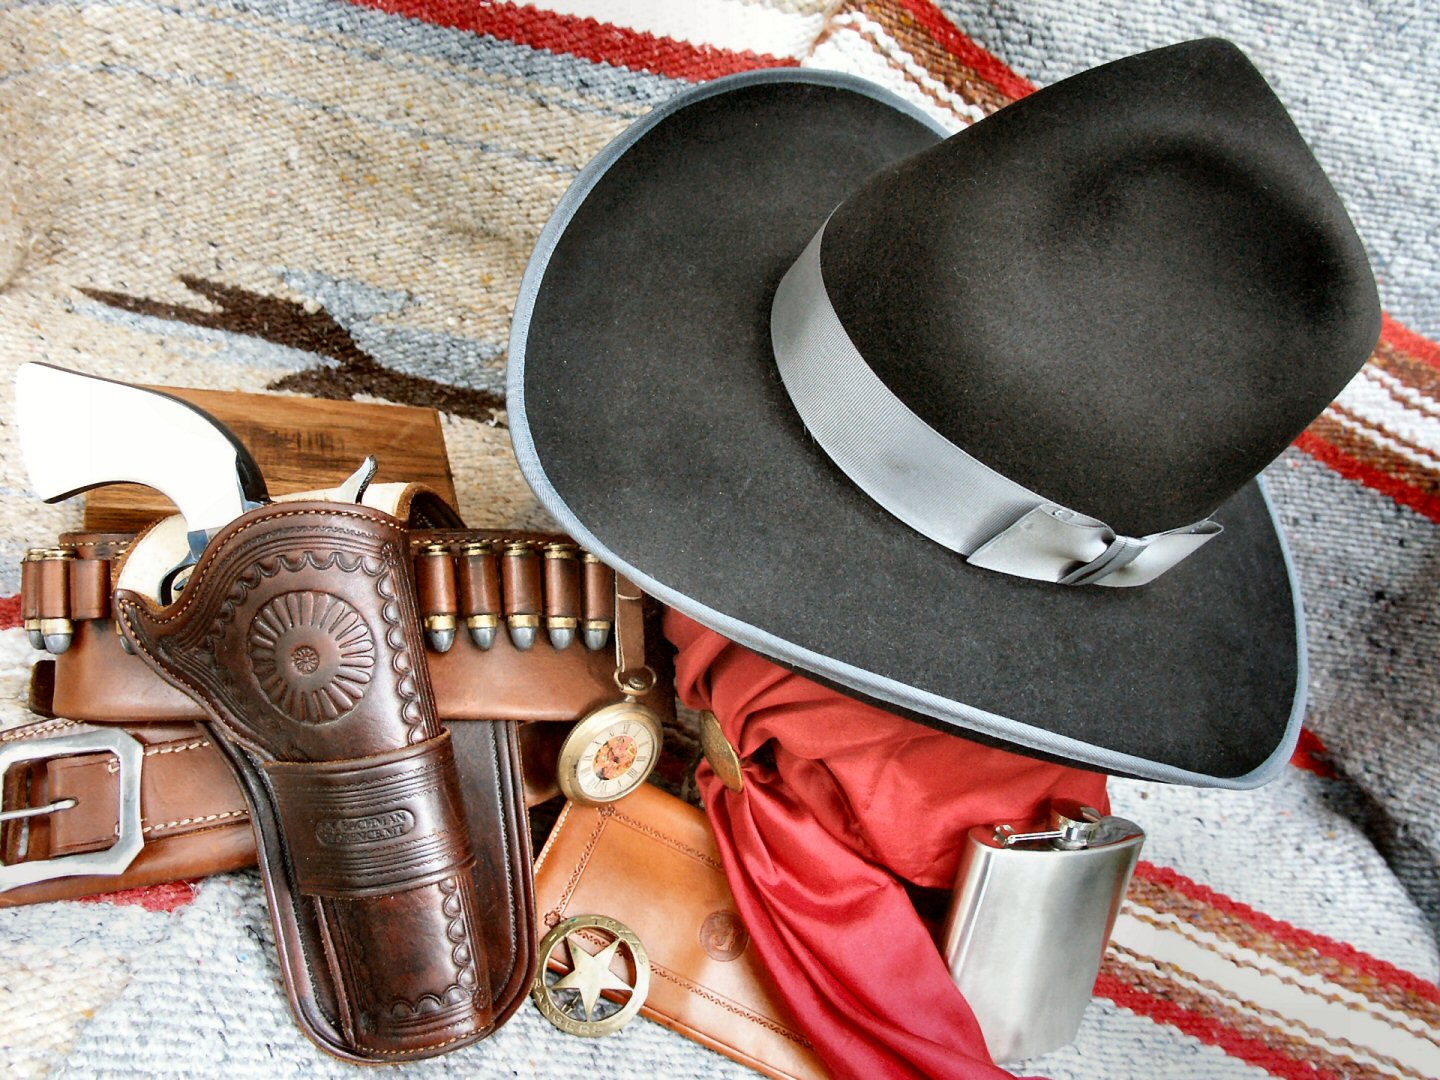
Two STETSON hats: a brown, low 'Open Crown' in "Scout Style"; and a black 'Boss Of The Plains' in 4x buffalo quality.

Two further 'Open Crown' examples; the black hat comes in "Preacher Style"; the light one in typical, worn "Drover Style".
The shape of the hat - reflection of a hard life
Due to the constant use of the hat, the permanent effects of weather and the use for other purposes - it had to serve both as a 'watering bucket' for the horse and as a 'pillow' for the exhausted cowboy - the good piece lost its original shape quite quickly. However, the easy to reshape felt made it possible for the Drovers to bring their hats into shape over and over again. And this is how the various shapes of hats came into being, each of which was ultimately used as a distinctive mark of its owner.
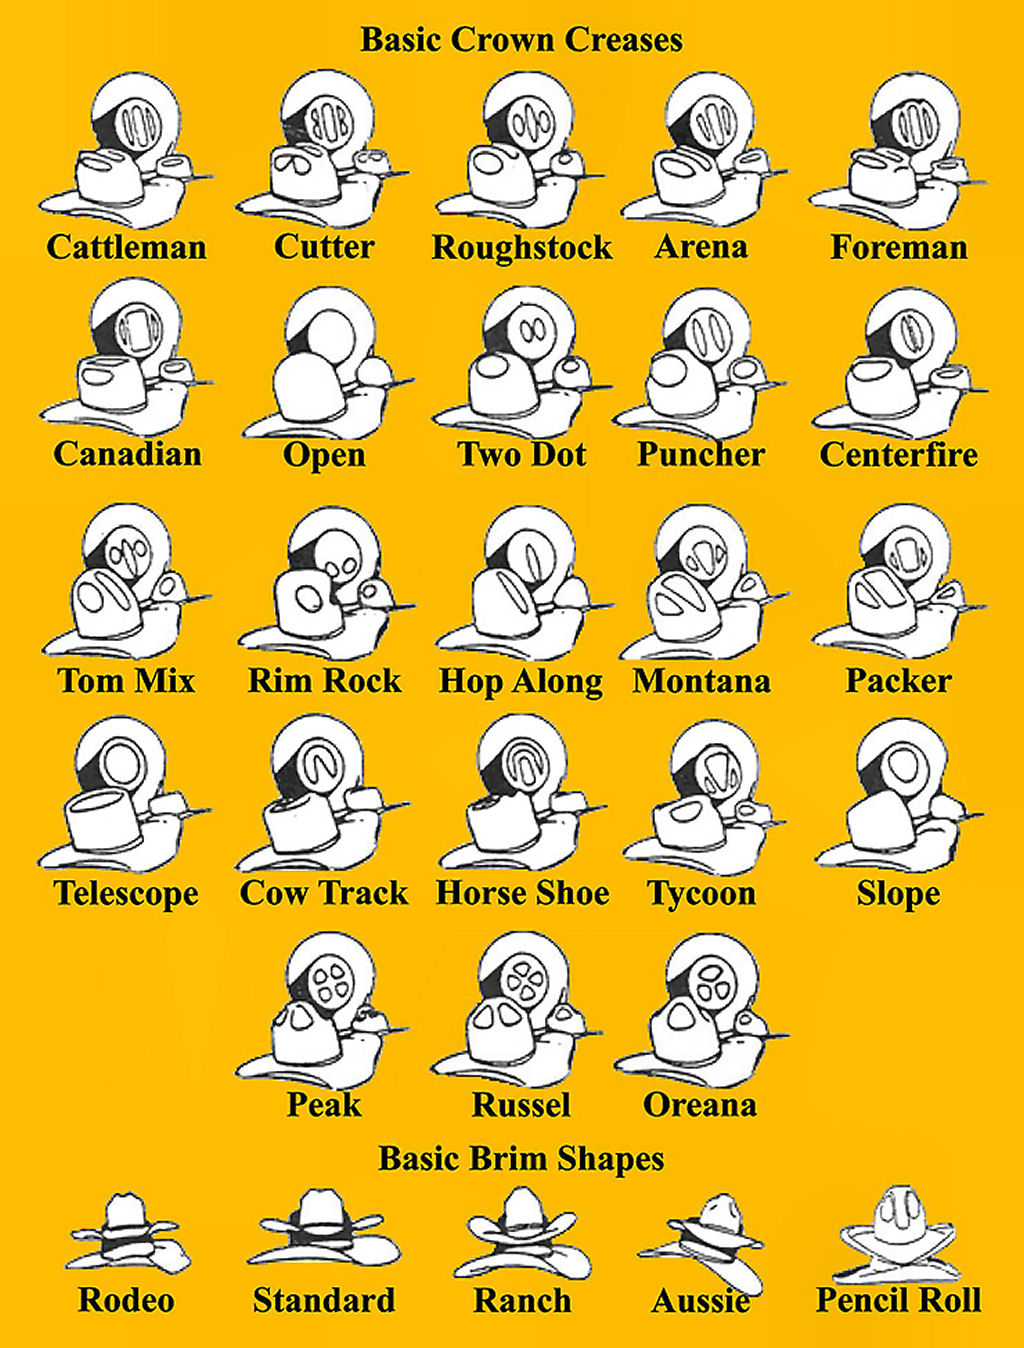
'What'll it be!?"-The countless opportunities of customizing the shape of a hat; © Craig Staker, STAKER Hats.
Many hats found their way from the military into the bunkhouses of the ranches. These were often wide-brimmed officers' hats with crowns that were also notable for their height.

Imposing brim widths of 4 ½" and crown heights of 6 ½" give their owners plenty of room to 'style' these hats individually.
John B. Stetson - Hat fashion for cowboys & gentlemen
After John B. Stetson began to manufacture hats, among other things, in his company in Saint Joseph, Missouri, starting in 1865 and threw them on a 'hungry market', the triumphal march of the 'STETSON' cowboy hat was unstoppable. Cattle drives from the South to the Midwest slaughterhouses of the fledgling U.S. had begun in the 1850s. And the young 'drovers' - or 'cow boys' - initially still wore the headgear of their fathers, for example, that they had brought with them from the 'Old World/Europe': caps, knitted woolen hats or hats of townspeople and farmers. There were also hats of Mexican origin.
A traditional company on the rise
However, all of this equipment lacked the size and the expansive brim of the hat that protected its wearer from the weather-related elemental forces on a cattle trek. - John B. STETSON had the solution. His products offered a hat-crown whose height ensured 'plenty of fresh air under the dome'; and a brim that protected the face from direct sunlight and allowed rain to drip off. Far beyond the end of the legendary Cattle Drives that ended at the beginning of the 20th century, 'his' company still sells and continues to sell the legendary Stetson as loved by the cowboy and the hobbyist; but with changing production numbers; with changing quality; and with ever-changing sales philosophy:
In the 1880s, the target audience was the 'cowboys'; after the turn of the century, it was the movie industry and the fancy crowd; and today, the STETSON Co. seems to be looking for a way to reconcile tradition with today's consumer behavior and bring it to a reasonable level ...
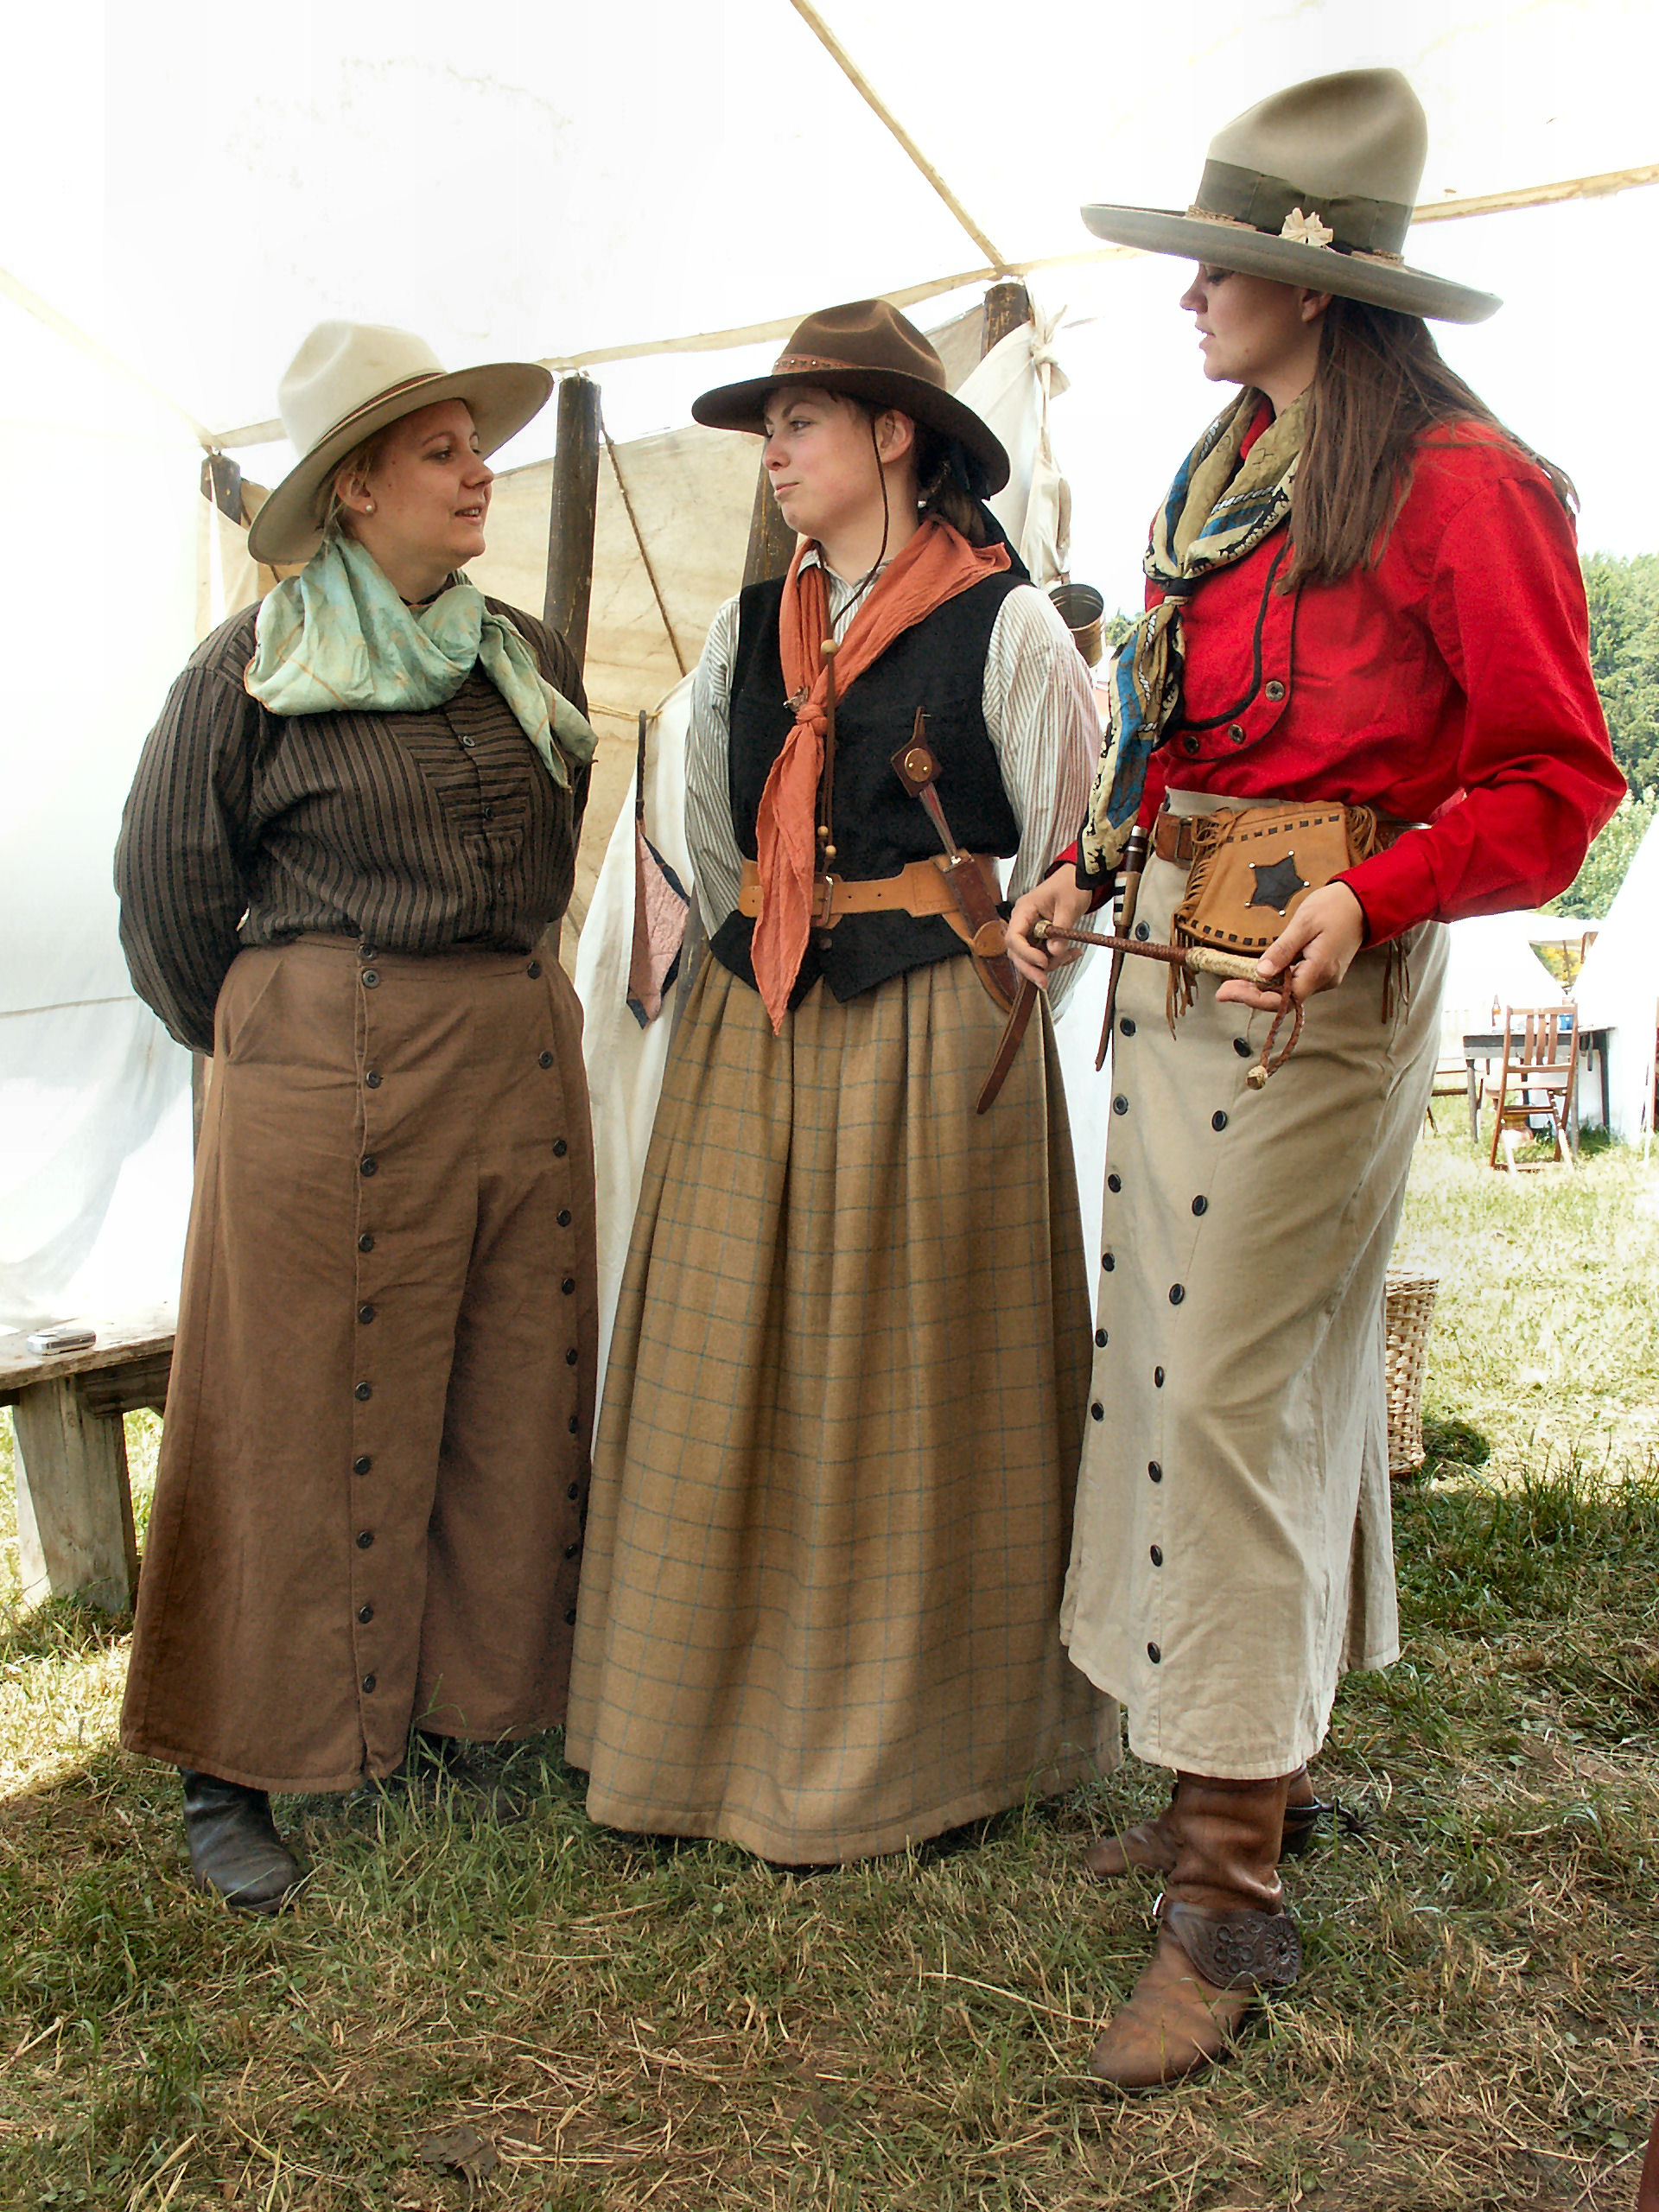
Especially Western ladies attach importance to a neat headgear! Many a cowboy can take a leaf out of their book!
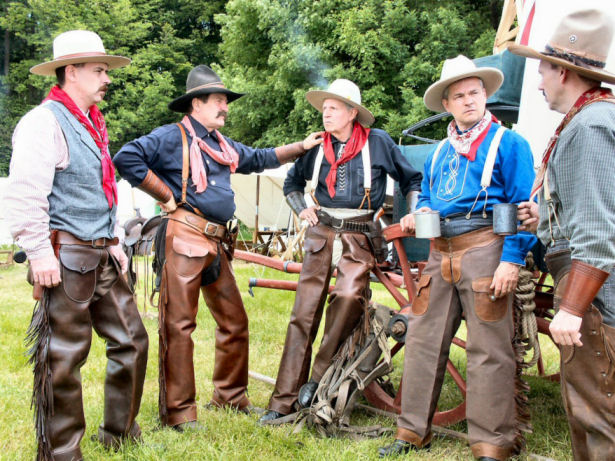
A cross-section of Western hobbyists' 'hat fashions'; in the center, legendary German Old West saddler Willi Baumann, † 2015.
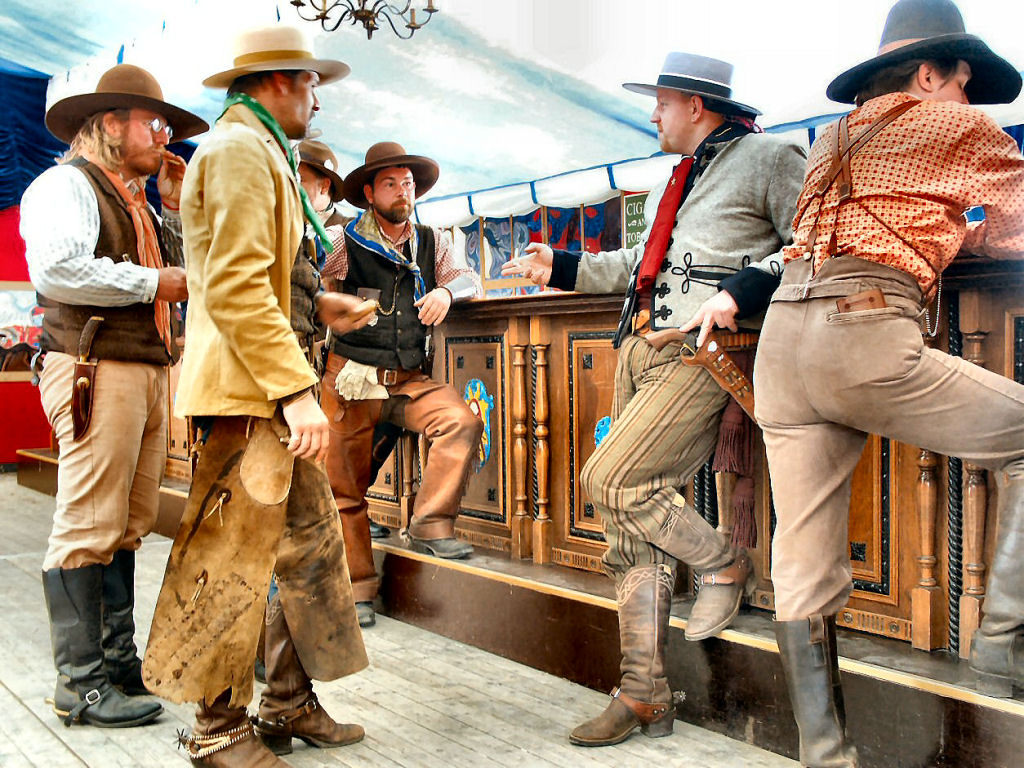
The saloon as a catwalk. The pictures were taken by me (authorized reporter) at the 'Western Council 2004' and carry my copyright.
The cowboy hat - it's more than just a "hobby
Since I have been active in the hobby, hundreds of hats have passed through my hands. I have collected them, I have traded them; and I have given them away to friends. The whole "dilemma" continues to this day!


The slideshow shows a cross-section of the common hat shapes in the Western hobby. Allowed is what pleases ... and what you want to pay!
If you'd like to learn more about the hip and current hat manufacturers, felt qualities, 'self-made' hat restoration, or how to handle and appreciate 'all things Western Hat', let me know. I would love to continue to share, your
P e t e
a.k.a. marshdillion
About the author
Peter Jakob Klein
a.k.a.
marshdillion
Pete has been at home in 'Western Reenactment' for 50 years; he is a freelance radio and TV journalist and is now retired; he has worked for the German ARD stations.
When it comes to topics of the 'western hobby' or 'cowboy action shooting', you can find his contributions in the VISIER, among others.


August 1, 2021 @ 5:50 pm
Vielen Dank für den interessanten und informativen Beitrag, Pete!
Der klassische “Boss Of The Plains” ist bis dato einer meiner liebsten Hüte – wird Zeit, dass ich mir auch endlich mal einen anschaffe!
Keep up the good work!
August 2, 2021 @ 1:43 pm
D a n k e für die Blumen! Aber DAS ist eigentlich nur der Anfang einer ‘unendlichen Geschichte’ ..! Fängt man mit der Frage an, wie ich mein Lieblingsstück richtig aufsetze, pflege und in Form halte, dann ist man schnell bei der Bedeutung der ominösen ‘xxx-Qualität’ und der Diskussion, ob man Hüte ‘weiten’ kann. – Ich denke ‘mal, Gesprächsstoff gibt es genug; was auch für die ‘Bedenken & Anregungen’ von unserem Freund Chet gilt :-)) ..! – Wir hören bestimmt noch voneinander; und haltet Euer Pulver trocken, Euer P e t e
August 1, 2021 @ 7:57 pm
Hallo Pete,
ein sehr aufschlussreicher und gelungener Beitrag, vielen Dank dafür.
Ich denke, dass Dein Bericht bestimmt auch für „Hobby-Neueinsteiger“ als Ratgeber sehr hilfreich sein kann.
Aber auch alte Hasen – und ich bezeichne mich einfach mal so – können immer wieder dazulernen, denn bekanntlich lernt man ja nie aus.
Und tatsächlich würden mich weitere Fragen brennend interessieren und ich würde gerne mehr darüber erfahren:
1) Gibt es staatentypische Hutformen, an denen z.B. ein Texas oder California Cowboy (usw.) sofort zu erkennen war.
2) Dann findet man in den meisten Hüten einen sog. Qualitätshinweis über den Filz, z.B.: 5 XXXXX Beaver, Fur Felt, 4 X Buffalo usw.. Was war die meist verbreitete Filzart in welcher X Qualität – damals und heute!
3) Und letztlich die Preise! Was kostete damals ein guter Hut und mit welcher Ausgabe muss man heute für einen „Best-Hat“ rechnen?
Meiner Meinung nach ist dieses Thema unerschöpflich und ich bin jetzt schon gespannt auf Deine Antworten.
Ich hoffe auch, dass sich unsere Leser trauen, hier weitere Fragen zu stellen.
Wir – die TRP – würden uns in jedem Falle sehr darüber freuen, wenn wir in einem weiteren Blog-Beitrag “Let’s talk about hats – Vol. 2” mehr Informationen zum Thema „Cowboy-Hat“ von Dir bekommen würden.
So long, Chet
August 2, 2021 @ 5:00 pm
Super Interessant – auch für einen Indianer.
Vielen Dank für diesen Beitrag.
October 25, 2021 @ 7:05 pm
Hi Friends! Da habt ihr aber eine schöne Seite und der Hut-Blog passt mir gerade prima in den Kram. Ich habe nämlich eine Frage. Ich besitze einen Western-Hut den ich nicht hergeben möchte. Mit ihm sind zu viele Erinnerungen verbunden. Über die Jahre hat er aber einige Mottenbisse abbekommen. Und jetzt meine Frage. Wie kann ich diese Löcher stopfen oder auch nur etwas abschwächen. Also eigentlich sind es keine Löcher sondern nur solche Vertiefungen. Maximal ein halber Zentimeter. Aber sie sehen eben nicht gut aus weil sie auf der Krempe und oben auf dem Hut-Körper sind. Wer kann helfen? Fragt der Max
October 26, 2021 @ 5:48 pm
Vorweggesagt: Wenn der zu reparierende Hut nicht ein absolutes Teil von hohem Wert ist (also ein Sammler-Stück oder ein teures Unikat), dann vergesse ich den Mottenbiss. Bei einer ‘Reparatur‘ kann ich nämlich mehr zerstören als Instand setzen; vor allem wenn ich ungeübt bin! Außerdem gehört ein Mottenbiss zu jedem gut getragenen Hut dazu … – Wenn allerdings Ihr – und im Besonderen der Max – mich fragt, wie ich gut sichtbare Motten-Bisse minimieren würde, dann geht das so: Ich wähle die Kombination aus ‘Schleif-Methode‘ und ‘Nadel-/ Klebe-Methode‘ … ZUERST ‘breche‘/ verflache ich die Ränder der Mottenbisse, indem ich sie ABSCHLEIFE (feines Sand-Papier; oder Abschaben der Biss-Ränder z.B. mit einem Messer). Dann ‘besorge‘ ich mir FÜLLMATERIAL zur Auffüllung der Biss-Stellen; dazu trage ich an einer verdeckten Stelle meines zu reparierenden Hutes Filz-Material ab; wiederum mit Sandpapier; oder mit einem aus Kunststoff bestehenden Schleif-Bock; oder mit einer harten Zahnbürste. Das Material entnehme ich aus dem Inneren des Hutes; da, wo es keinem auffällt und die Entnahme den Hut nicht allzu sehr schwächt… ANMERKUNG: Man benötigt schon eine gewisse Menge von abgetragenem Filz-Material, um nachher damit Löcher stopfen zu können … Das gewonnene ‘Rohmaterial‘ werde ich später, a) entweder unter Zugabe eines Industrie-Klebers (transparent, farblos, hell) oder b) unter Zugabe von Feuchtigkeit (Spucke geht ganz gut) zu einer Füll-Melasse vermischen. – Bevor ich diese Füllmasse auftrage UND einmassiere, muss ich die Ränder der Mottenbisse präparieren. Dazu pikse ich mit einer Nadel oder einem anderen feinen Stick (z.B. Zahnstocher) VIELE KLEINE LÖCHER in den Randbereich und in das INNERE des Mottenbisses. Diese Löcher nehmen die Füllmasse auf, die ich letztendlich im Motten-Biss verteile und EINMASSIERE; dann trocknen lassen und erneut glatt schleifen … ANMERKUNG: Jeder Dreck, den Ihr an Euren Fingern tragt, wird nach dem Einmassieren in der ‘ausgebesserten‘ Stelle zu sehen sein. ALSO: Hände waschen! … Ganz schön aufwändig, oder!??… Deshalb meine Frage: Lohnt sich die Mühe einer solchen Motten-Biss-Reparatur wirklich ))!!!??? – Pete –
October 26, 2021 @ 6:21 pm
Nach der Reparatur und dem Abtrocknen der Reparaturstelle kann man letztere zusätzlich mit einem Filz-Pflegemittel einsprühen; das konserviert und löst gegebenenfalls Unreinheiten; z.B. ‘Felt Hat Rain & Stain Protector Spray’ gibt es von etlichen Herstellern … Übrigens: Die Bisse und Löcher verursachen die Motten-Larven! Wenn Ihr also eine Motte in Kleider-Nähe entdeckt, ist es meist schon zu spät …
October 27, 2021 @ 6:59 pm
Übrigens: Filz-Nadeln/ Nadeln fürs Filzen gibt es im Internet zu kaufen; im Set oder bereits zu Mehreren (mit Griff) montiert; für unter 10 EURO …
November 1, 2021 @ 2:05 pm
Ja hallo. Der Pete hat recht. Das ist viel viel Arbeit so einen Mottenbiß zu reparieren. Und erst das Abschaben des Filz um Füllmaterial zu bekommen. Jetzt unterstützt mich meine Schwester. Die kennt das noch aus dem Werkunterricht in der Schule wo die auch schon mit Filz gebastelt haben. Wenn mein Schwesterlein Zeit für mich hat dann geht es gemeinsam ans Löcherstopfen. Wenn alles geklappt hat dann melde ich mich und liefere meinen Bericht ab. So long, sagt Max