
Old West Cooking – Spruce Beer
Spruce tips - From the tree into beer
Reading time: approx. 6 minutes.
Tuesday 06 July 2021
When in spring the temperatures slowly rise again and the plants begin to form their leaves and flowers, then it is also the perfect time for the brewer to prepare beer. The recipe we present here, however, has nothing to do with hops and malt, but is based on the young shoots of spruce.
I, as well, have taken advantage of the recent spring to dedicate myself to a long-awaited project - making Spruce Beer.
Already in colonial times, the spruce served as an important source of vitamin C and can still be found in many traditional dishes. In a simple step by step guide, you too will be able to make your own delicious Spruce Beer.

The History of the Spruce Beer
As early as 1536, the French explorer Jacques Cartier drank a tea from a coniferous tree that the Saint Lawrence Iroquois called Aneda. The tea provided a surprisingly high amount of vitamin C, which was especially lacking aboard ships and could thus lead to scurvy.[1] But who is satisfied with tea in the long run, when it can also be beer?
The British Royal Navy took advantage of this knowledge in the 18th century and added spruce branches to existing shiploads of beer to protect against the disease.[2]

The French explorer Jacques Cartier.
Alcoholic Spruce Beer was especially common in the Thirteen Colonies of America, as well as Eastern Canada. This beer was mainly made with red or black spruce.[3]
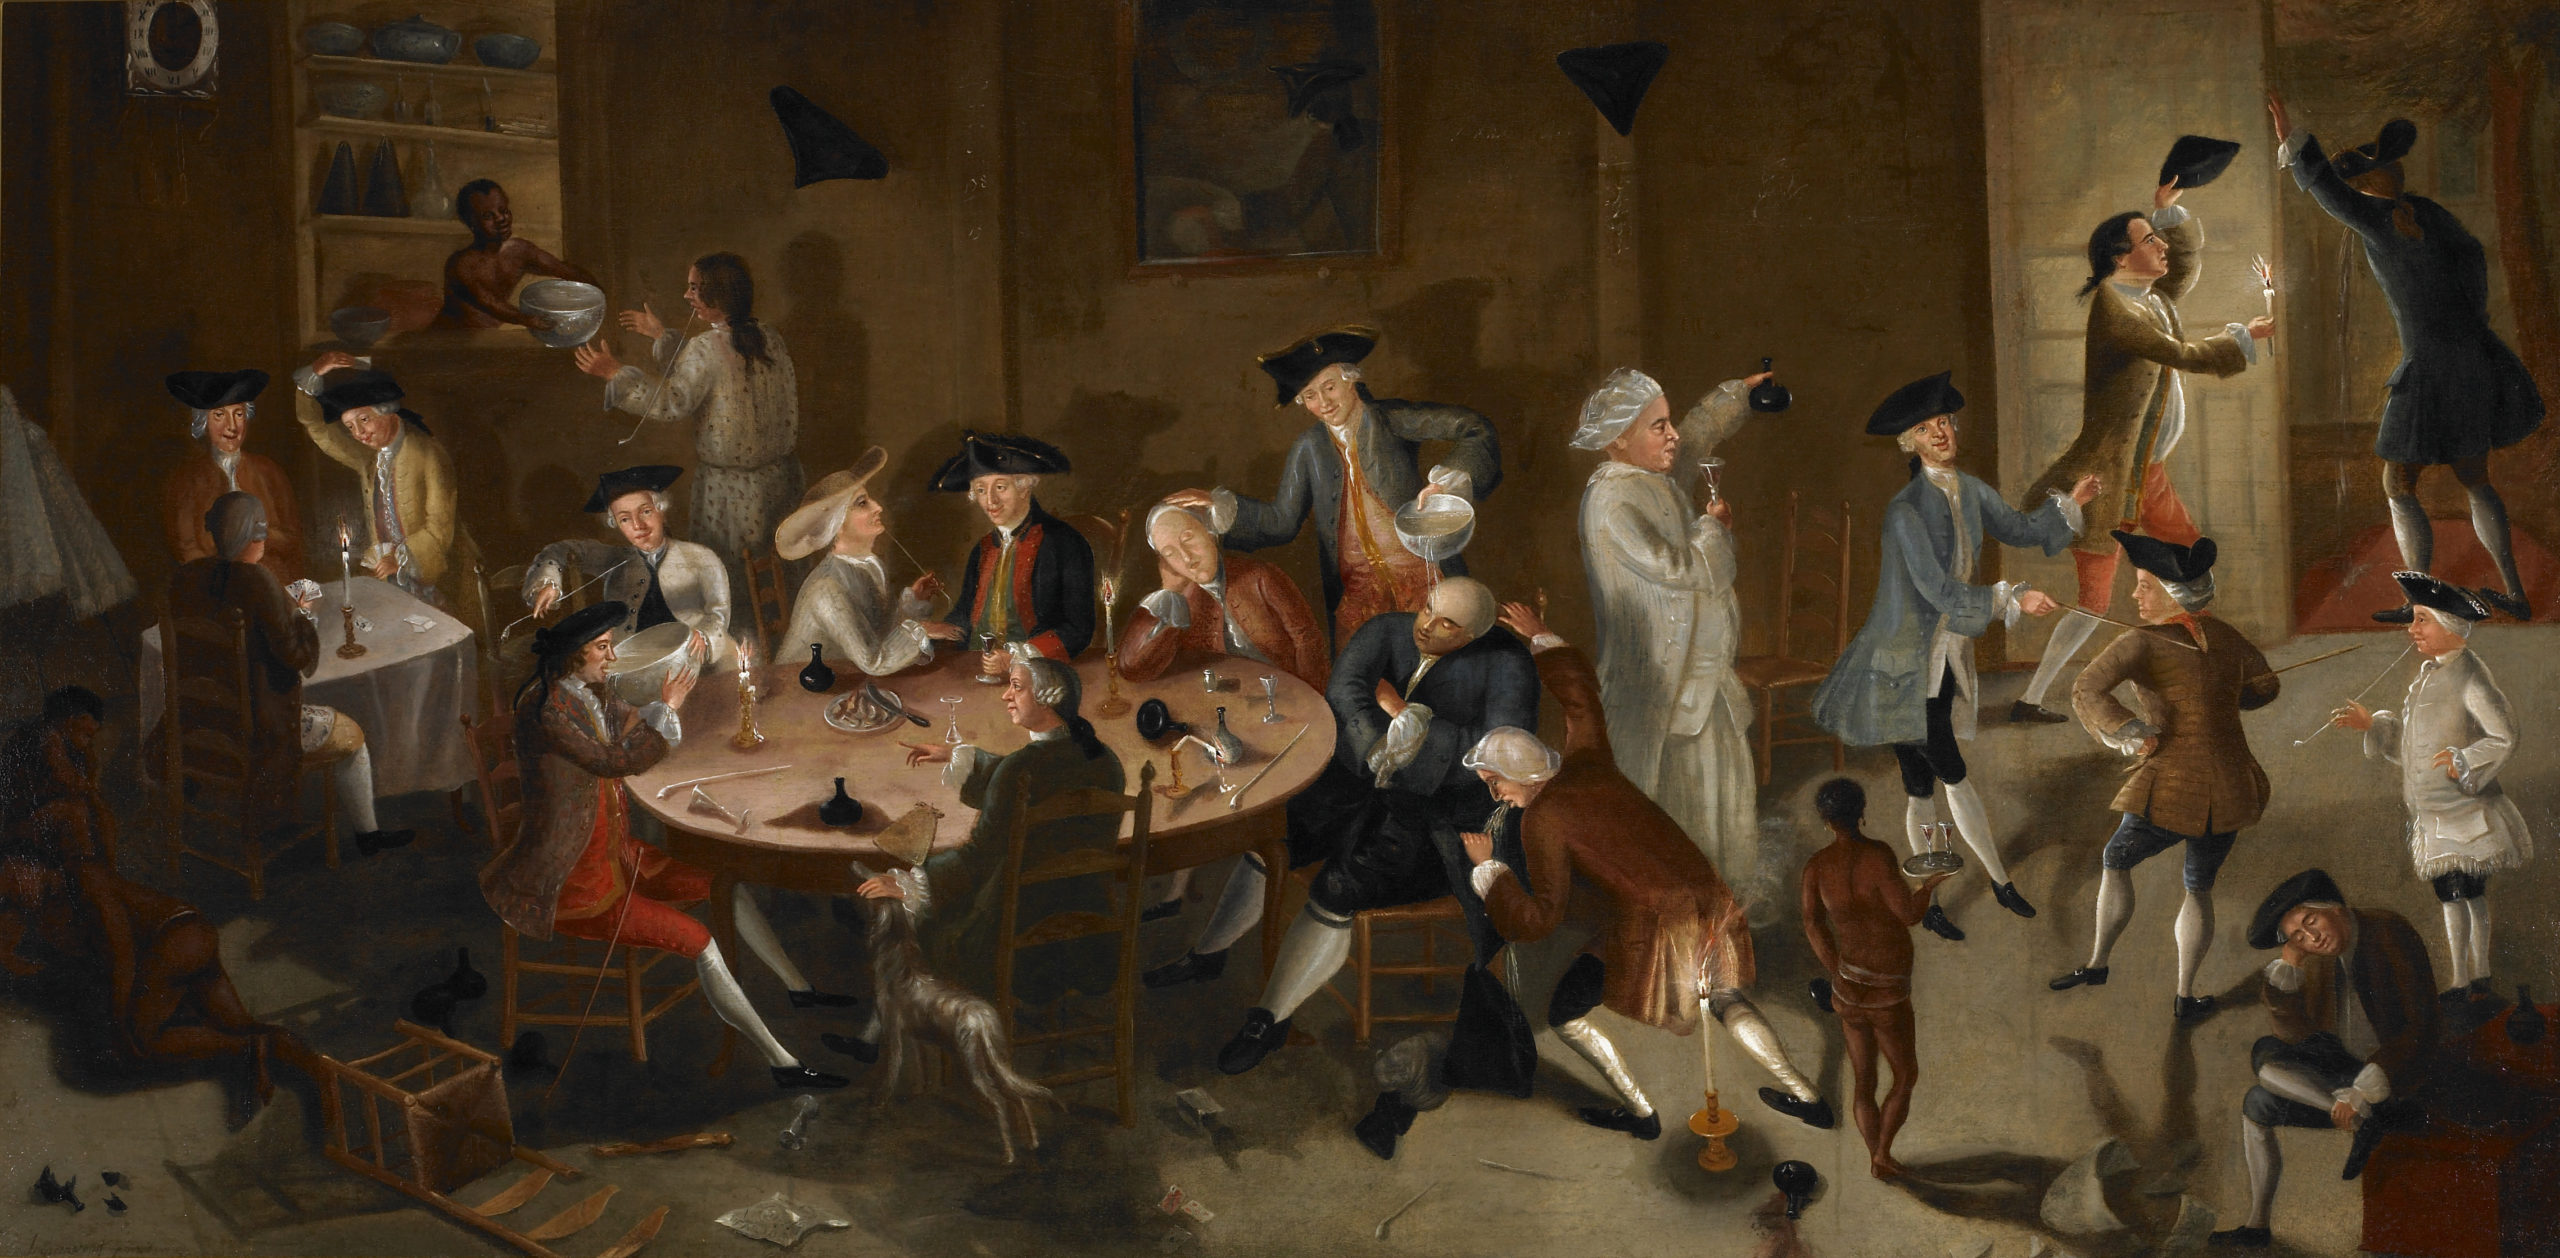
An illustrious gathering in a characteristic tavern - John Greenwood 1755
Spruces are evergreen, which means they do not lose their needles in winter. Just that was a huge advantage at that time, because the production of beer was possible almost at any time of the year.
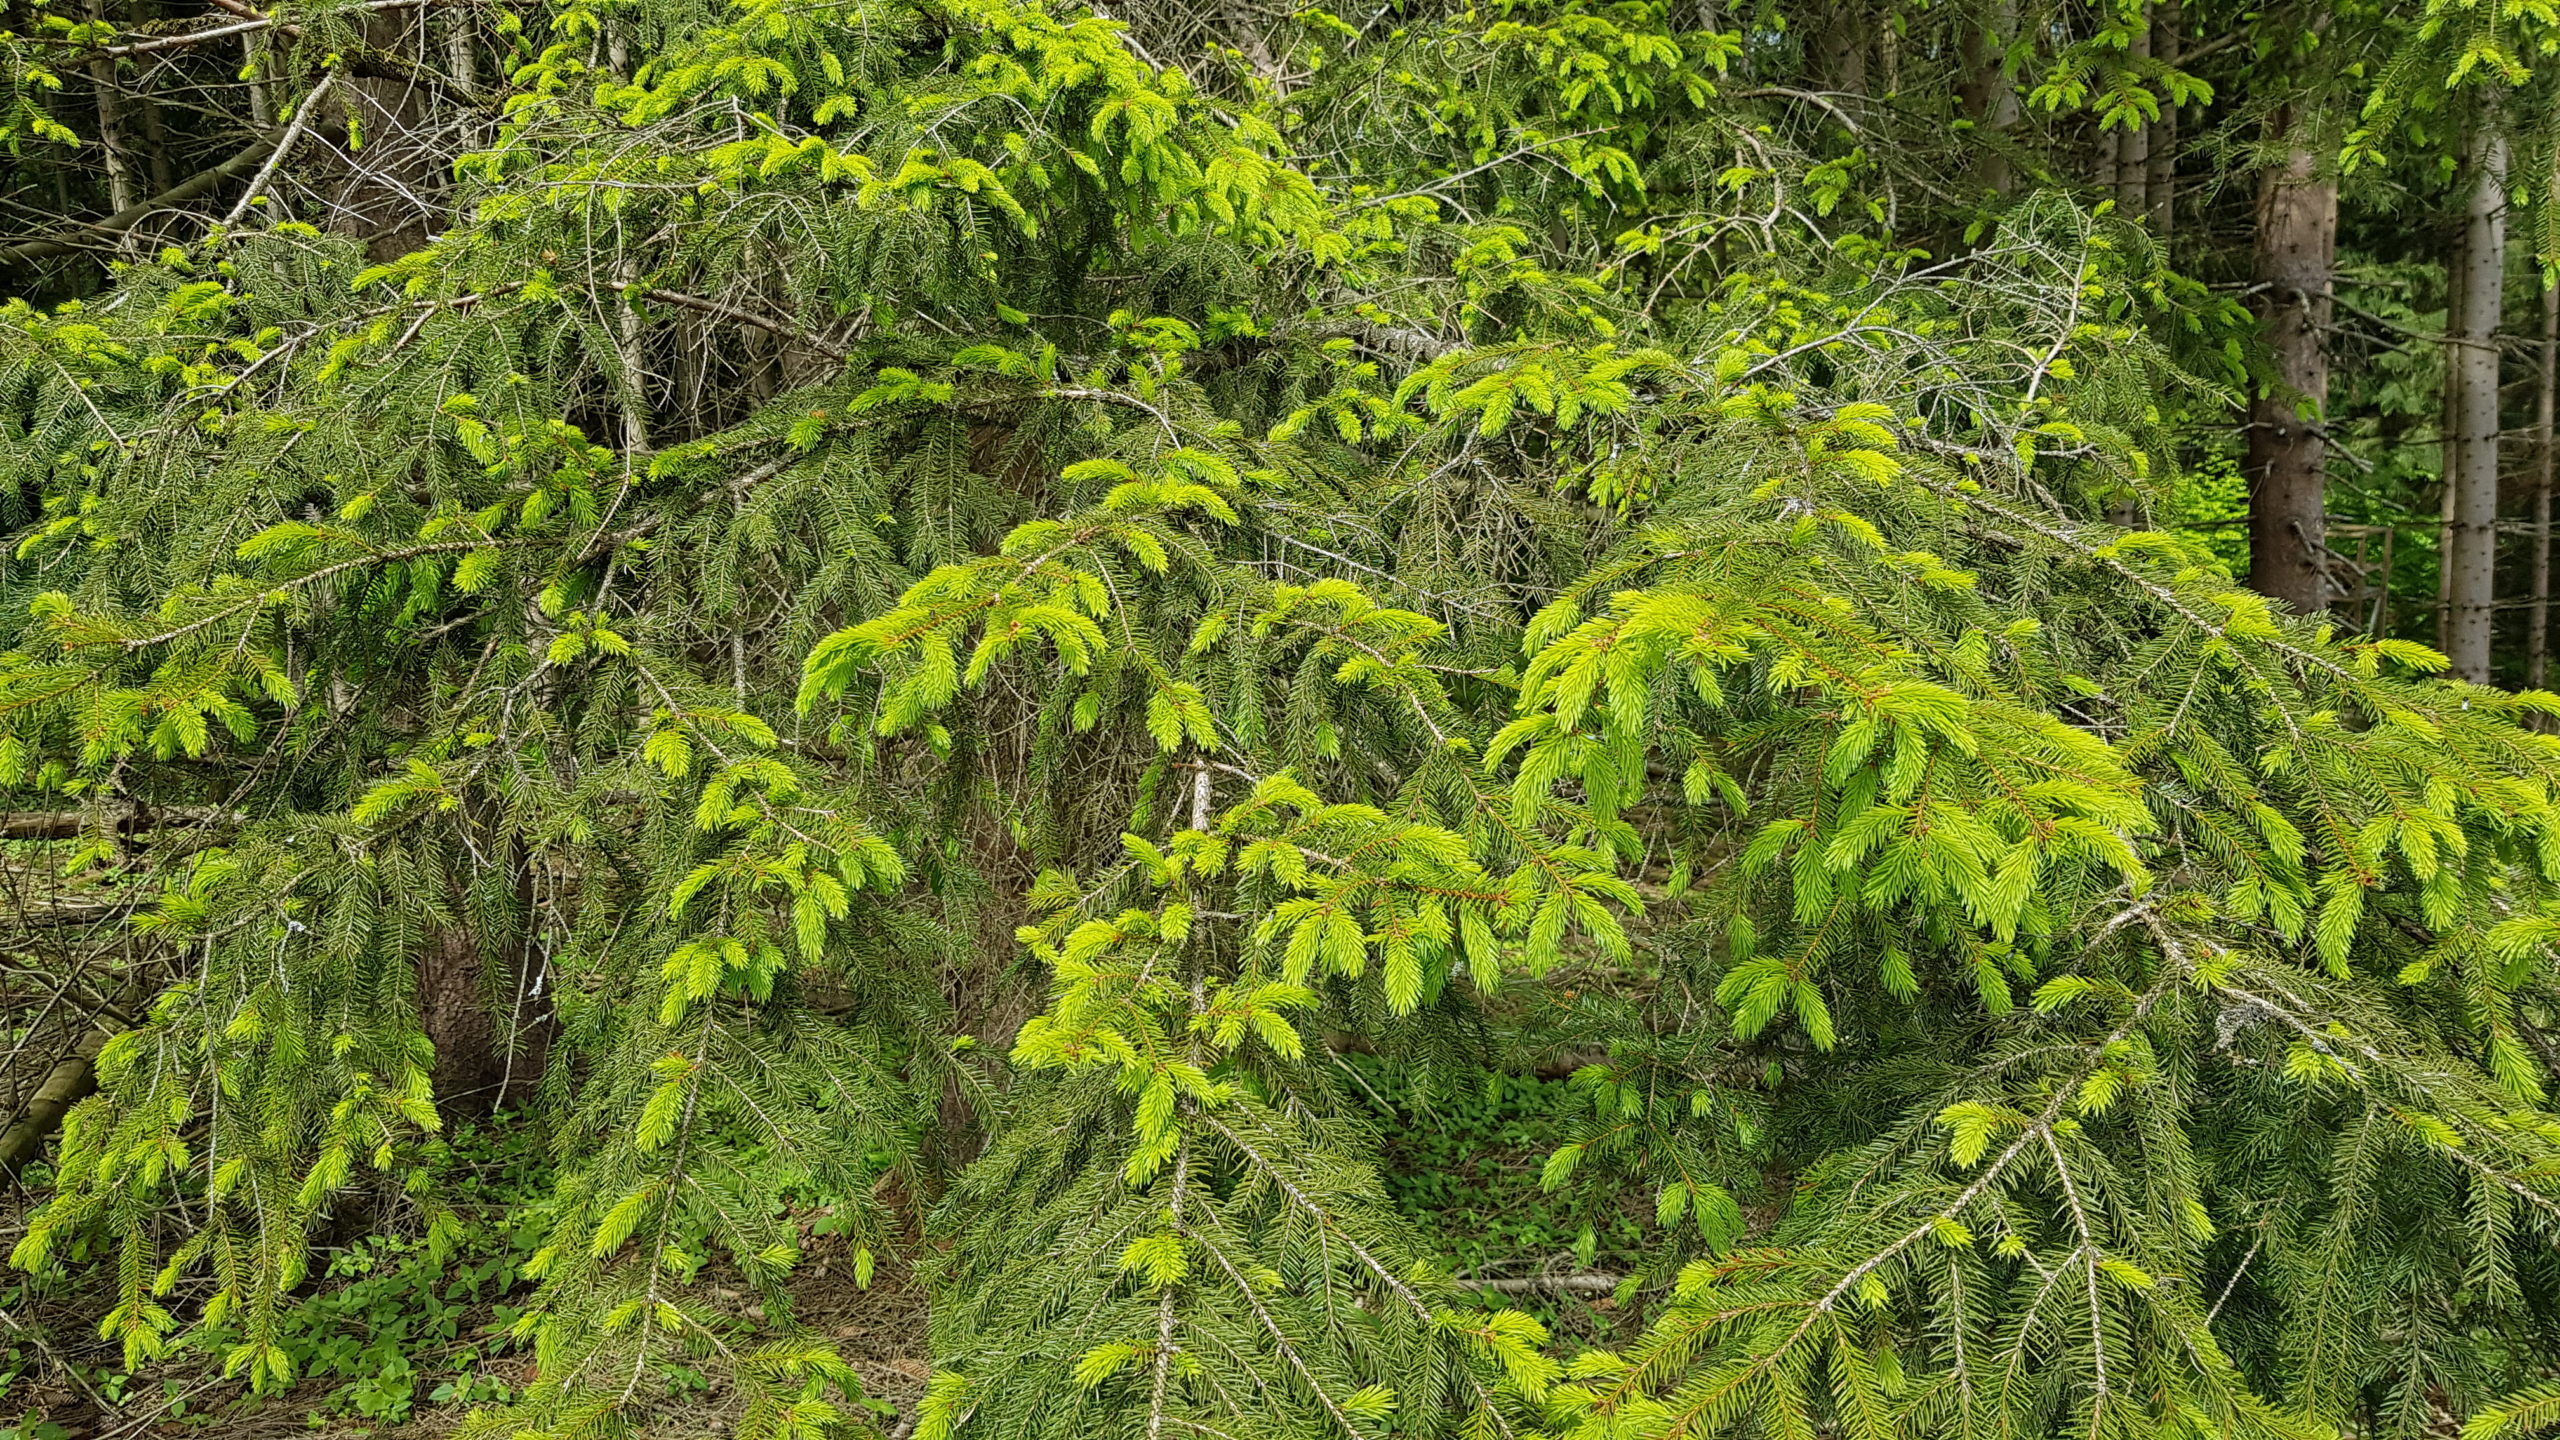
Young spruce shoots - in spring collecting is worthwhile!
It is precisely in the springtime, at the end of May, beginning of June, that the spruce forms young shoots that taste particularly intense. You definitely want this aroma in your beer. The shoots can theoretically be nibbled directly from the tree, they taste slightly sour and are a good energy supplier.
But be careful! Know your tree!
Before you set out to collect, you should be sure that the yield is actually the shoots of spruce. As a candidate that can be confused with the spruce, the highly poisonous yew is frequently listed. However, if you compare the two plants directly, you can see a definite difference. An illustrated plant guide provides certainty here. If the spruce is confused with the very similar fir, it is not too tragic, because their shoots are also edible.

The highly toxic European yew (left) and the edible spruce with young shoots (right).
To brew about 8l of beer, I collected about four handfuls of spruce tips, taking care to harvest evenly on each branch to avoid stressing the tree too much.
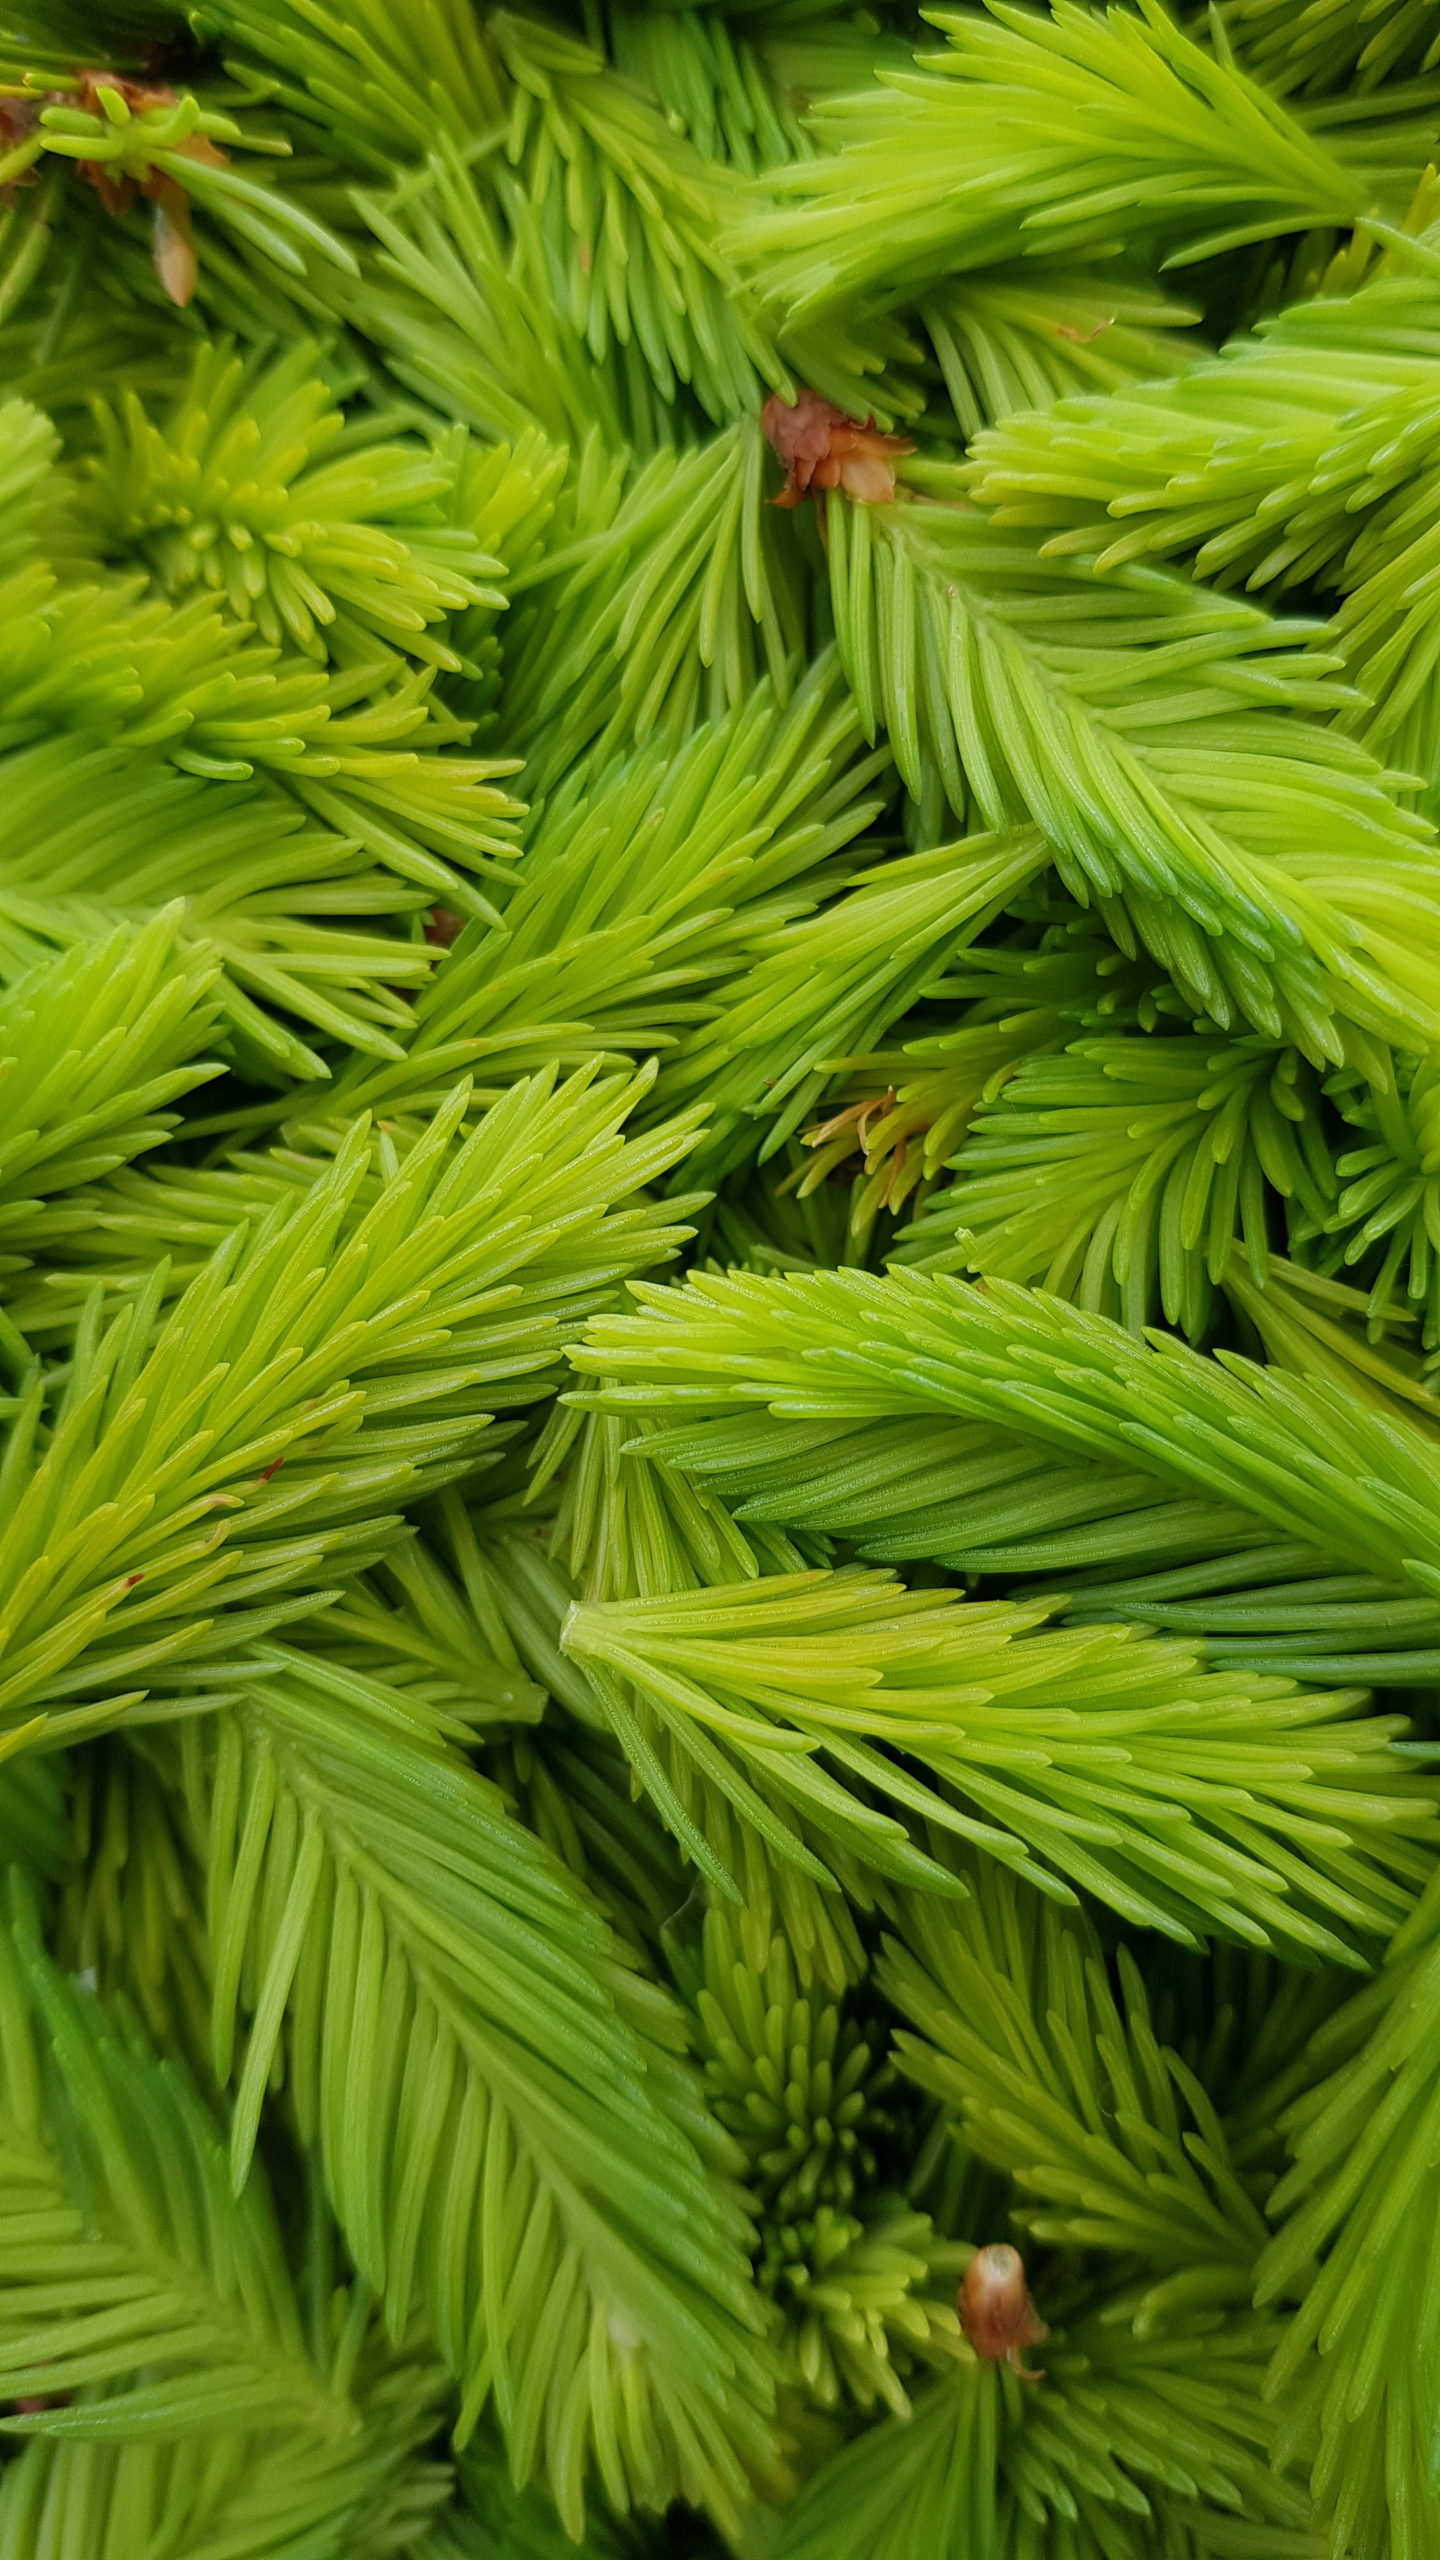

The young shoots of spruce.
The brewing process - from the raw product to the finished beer
Now it's time for preparation - after all, a beer like this doesn't brew itself! However, most of it is actually done for us by our brewer's yeast. But before that, a little preparation is needed.
What do you need?
- Two 8l pots with lid
- A ladle
- 24 empty beer bottles (0,33l)
- A funnel for filling
- Brewer's yeast
- a bottle cap set
- Isopropanol 99.9% for disinfecting
- a dripping stand for the beer bottles
- 500ml maple syrup
- 150g brown sugar
- 4 hands full of fresh spruce shoots
The basic rule that should always be followed is cleanliness! That is why I highly recommend disinfecting all equipment and hands before brewing.
- First, the freshly collected spruce shoots should be roughly cleaned of dirt. After that, simply wash with cold water.
- The washed shoots are placed in a clean, disinfected pot with 8l of water and boiled for about 30 minutes.
- Then all the shoots are completely removed from the pot.
- To the decoction add 500ml of maple syrup and 150g of sugar.
- Stir the mixture well and let it simmer for another 15 minutes.
- Then remove the liquid from the heat and let it cool down to room temperature.
- Dissolve the yeast in a little water according to the package instructions and stir gently with a (disinfected) finger.
- When the decoction has cooled to about room temperature, add the dissolved yeast and stir slowly.
- Now let the brew ferment with the lid closed for about 12 hours.
After the rest period, the yeast has worked properly, usually recognizable by already rising CO2 bubbles. My brewer's yeast naturally sinks to the bottom of the pot and forms a sediment. Now the second pot is used. The young beer is now carefully separated from the sediment layer with the ladle.
However, depending on the type of yeast, this process is optional. In the case of yeasts that are specifically designed for bottle fermentation, you can stir again to create a homogeneous mixture once more. This ensures that the same amount of yeast is present in each bottle when bottling. If the quantity is unevenly distributed, individual bottles may burst under certain circumstances.
Whether with or without yeast - now the bottles can be filled and corked.
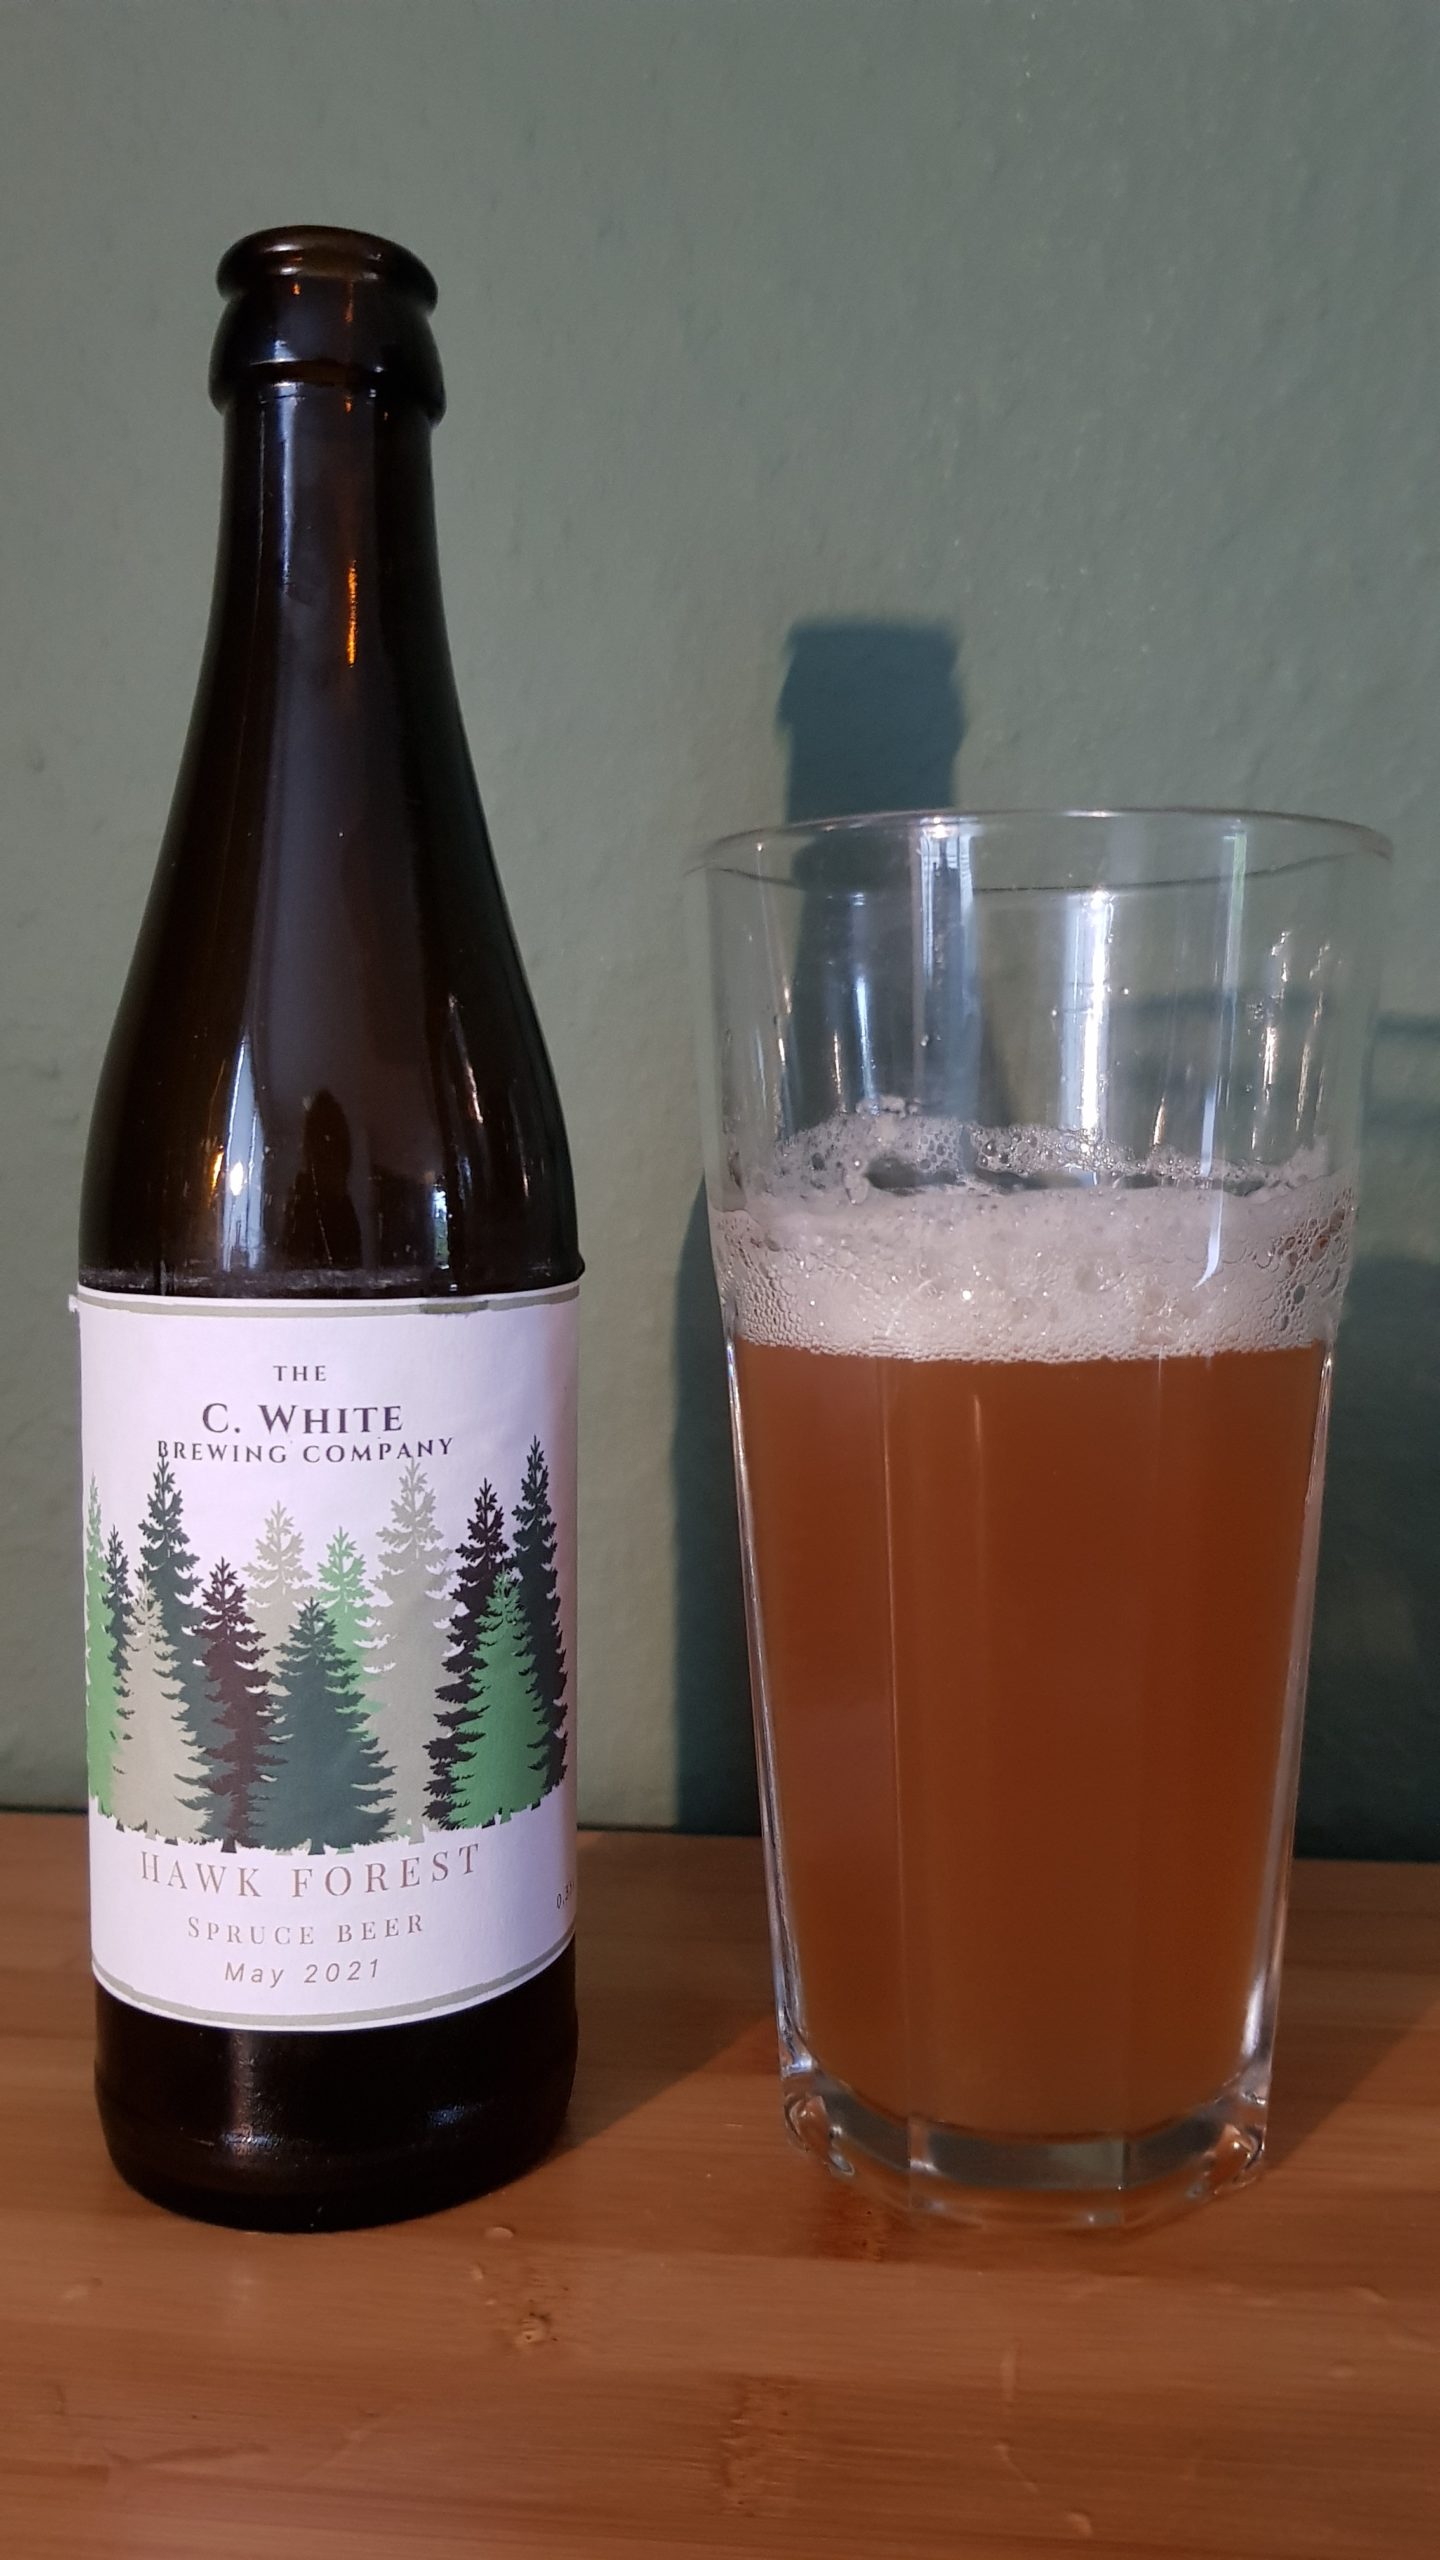
After 3 to 5 days the Spruce Beer is ready to drink!
The bottles should stand during the "maturation" in a room-warm, dark place - preferably in a way that nothing can happen in case of a bottle explosion. Because I felt the desire, I have designed a bottle logo in the meantime.
After just three days, enough carbon dioxide has accumulated to make the beer a pleasure to drink. Before serving, put it once again in the refrigerator, because no one would like warm beer!
However, Spruce Beer should not be stored in the bottles for too long. The yeast usually works until the sugar has been completely converted. This leads to a higher output of carbon dioxide, which accumulates in the bottle. The beer aged for three days will also taste slightly sweeter than the beer aged for 5 days.
My "sweet spot" was around four days. The beer no longer tasted too sweet and the amount of carbon dioxide was just right, in my opinion.
Taste-wise, the beer was excellent! However, the end product is very difficult to describe. The spruce shoots give the beer a slightly resinous note, but this is by no means unpleasant, but rather refreshing! Other hobby brewers compare Spruce Beer with Cola and wheat beer, which I can not agree with. Through the maple syrup and sugar it still has a sweet note, but tastes just unique!
Cheers!
In the past, the process was somewhat different...
In the past, of course, the work was done somewhat differently and, above all, much less clean. The brew was sometimes boiled with whole spruce twigs, with molasses, sugar or maple syrup and filled into barrels. The "external yeasts" on the twigs then kicked off the brewing process. Of course, this is always a bit dicey, because the beer can quickly turn unpleasant and become undrinkable due to these yeasts.
I also deliberately decided against molasses, because the inherent flavor of this would have been too dominant.
By the way - you can make great food with spruce tips!
Spruce tips are not only suitable for making delicious beer, you can also use them perfectly in cuisine. A really simple and yet incredibly delicious dish is baked salmon with spruce tips, jacket potatoes and sour cream.
Bon appétit
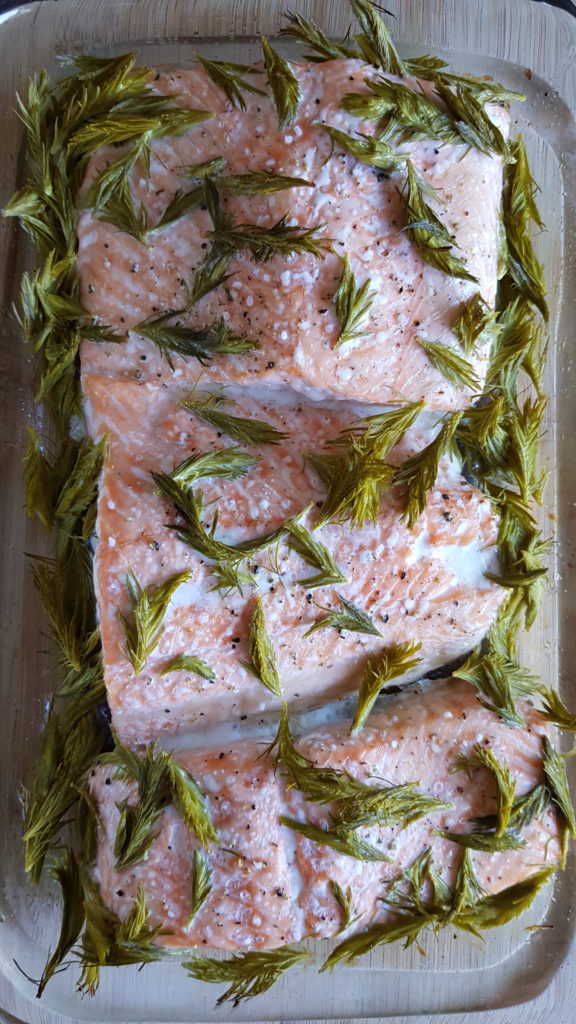
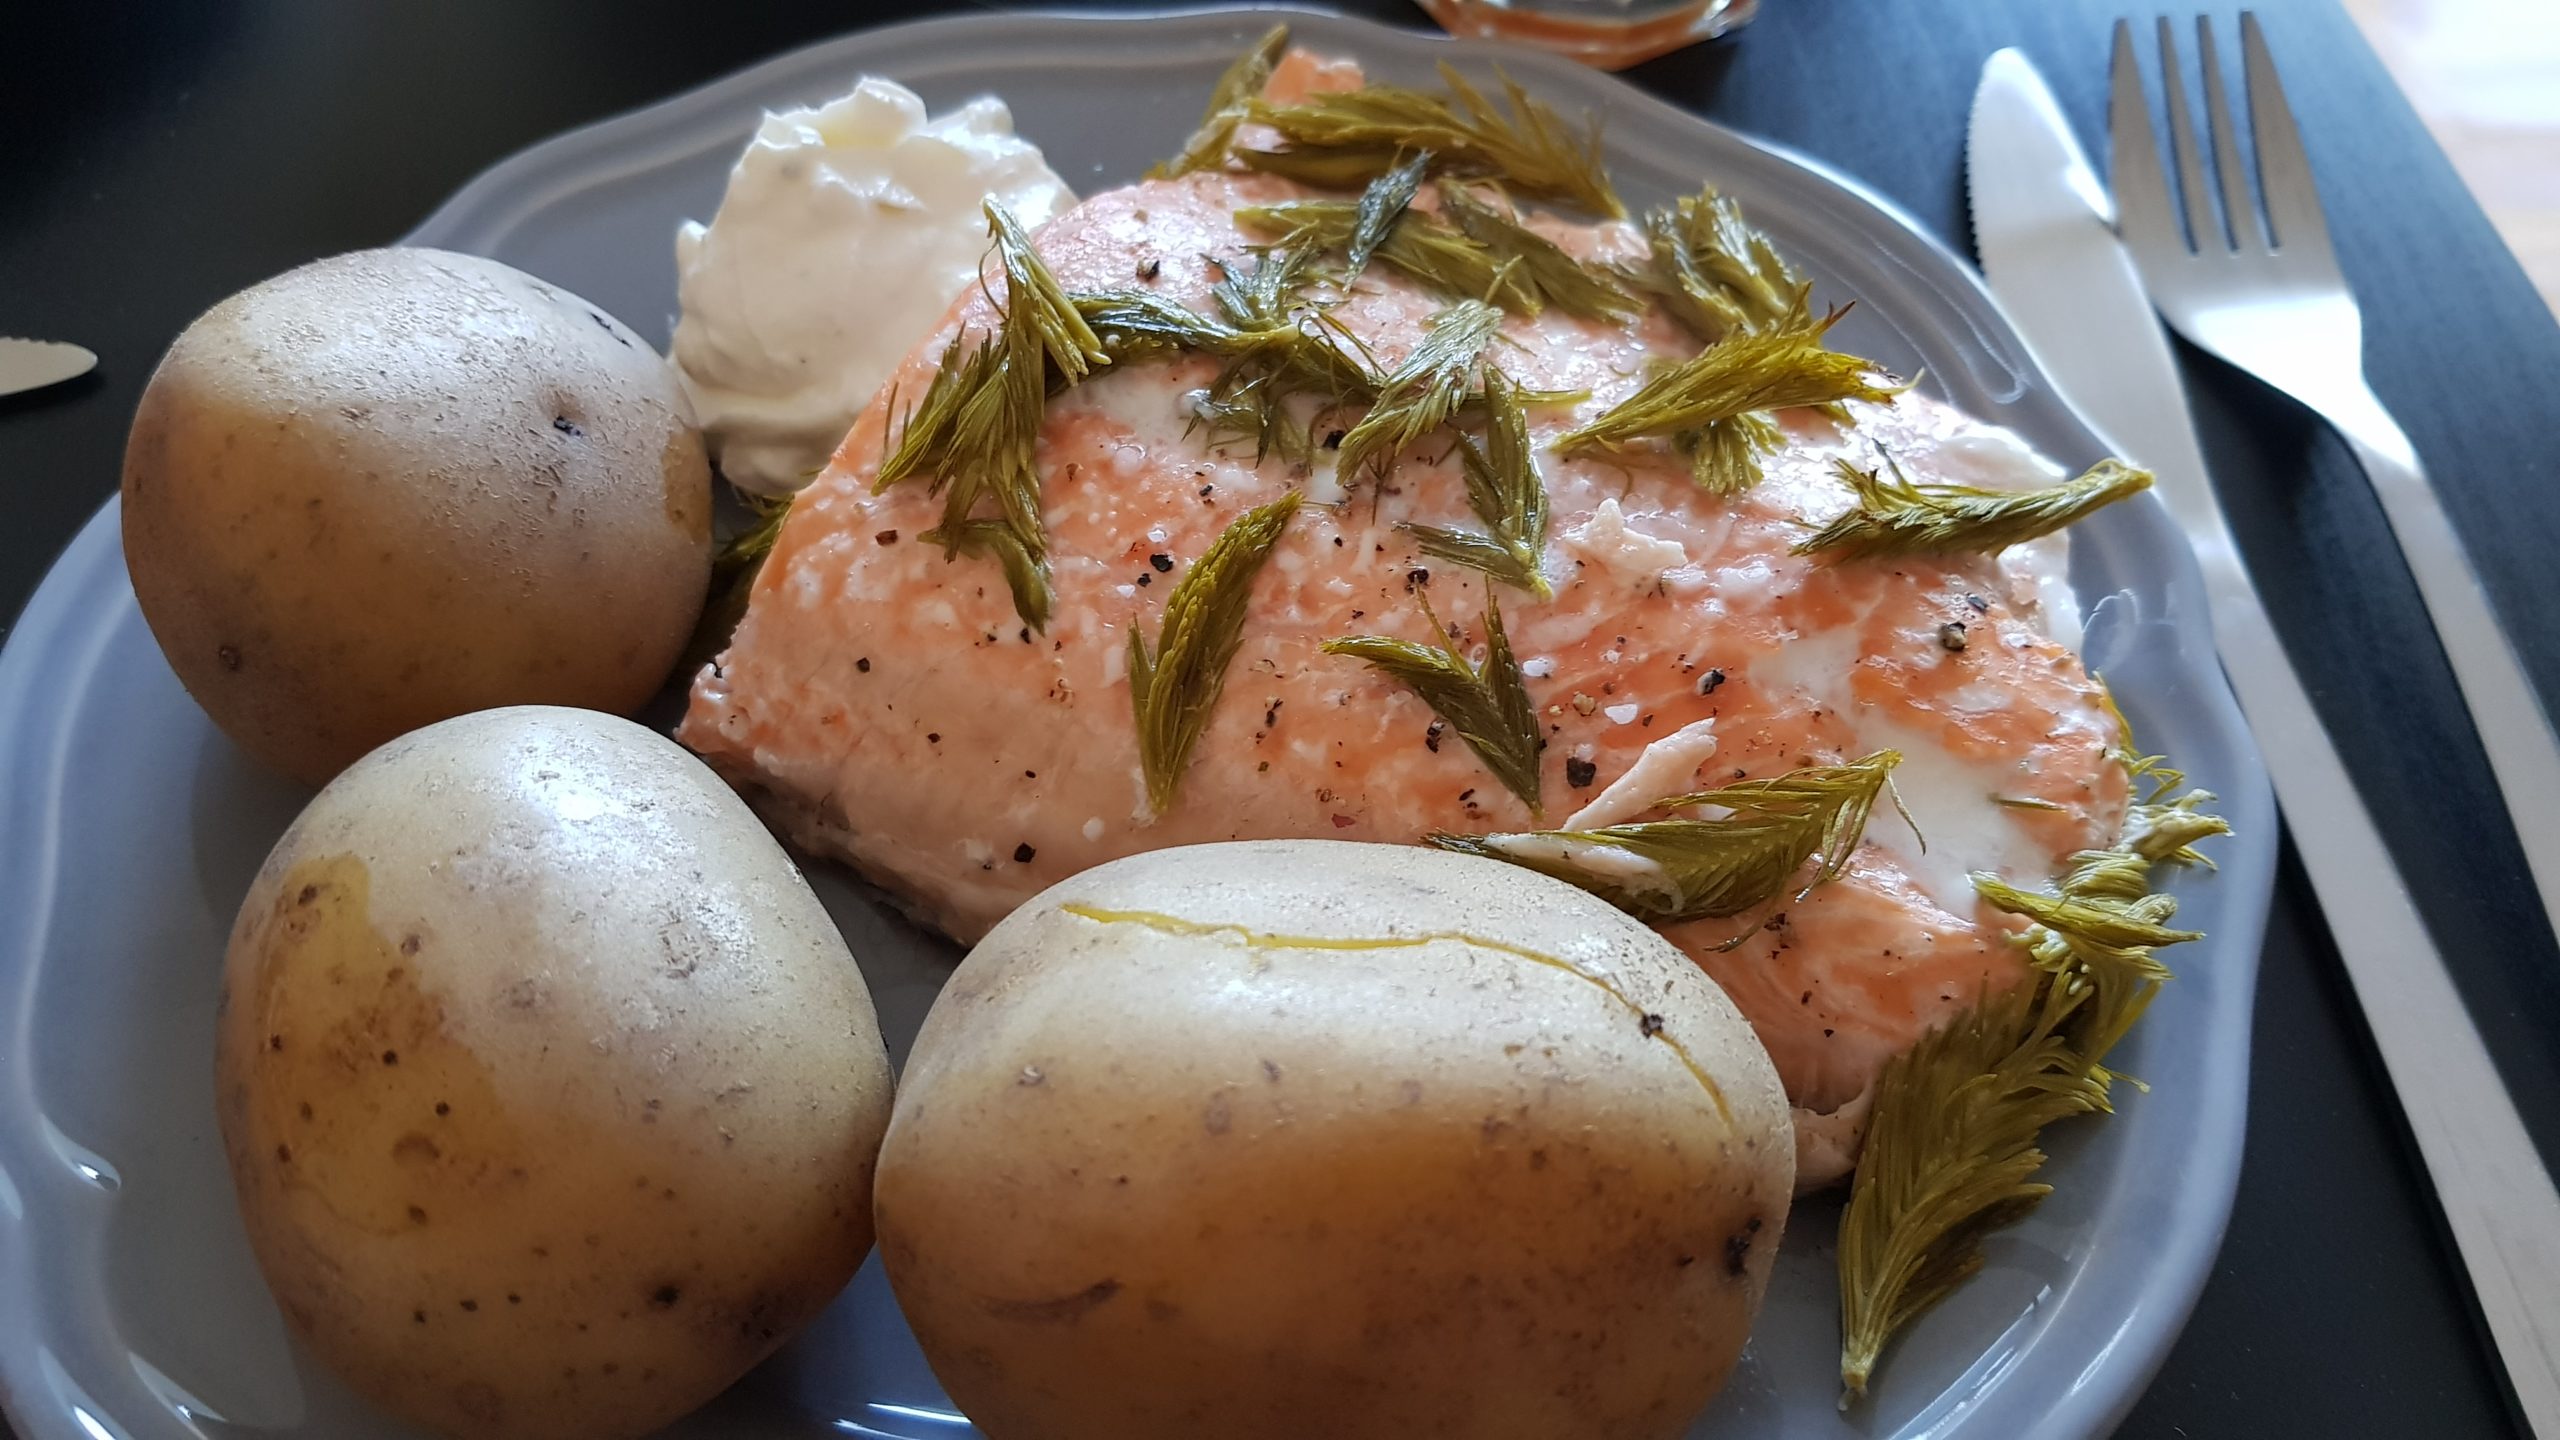
Spruce Tips baked salmon with jacket potatoes and sour cream. The Spruce Beer works great as a drink with it!
Place the salmon skin side down in a baking dish, season with salt and pepper, sprinkle with spruce shoots and bake at 200°C for about 30 minutes. As a side dish, boil potatoes with skin in water until cooked. Serve with sour cream. Done!
Colton White – Beaver Creek Pioneer


